ATAC-seq - FASTQ upload
Last updated: June 3, 2025
Run the Pluto ATAC-seq pipeline with your raw data files.
ATAC-seq is a technique used to determine chromatin accessibility on a genome wide scale.
1. Create Experiment
Start by choosing with project to associate your experiment with, the model organism for your experiment and the experiment type.

2. Upload assay data

3. Upload sample annotations

Finally, you'll upload sample data for each of the samples in your dataset in a .csv file. Here is an example format for sample data from an ATAC-seq experiment. Pluto has templates available for download within the experiment set up dialogue.

4. Configure your pipeline

Your next step is to configure your pipeline. Here you'll enter information about the genome annotation you'd like to use, the library type and peak caller.
Genome - This field will populate with available genome annotations based on the organism you chose when creating the experiment. If this dataset is part of a larger experiment, make sure to select the same genome as your previous analyses in Pluto.
Library type - Paired end or single end. This is dependent on how your libraries were prepared for sequencing.
Peak Caller - On Pluto, you have the choice between MACS2 and SEACR for peak calling. Check out this article if you'd like some extra guidance on how to choose your peak caller. You'll also see some extra settings for peak type (narrow or broad) and peak p-value cutoff.
5. Start your analyses!
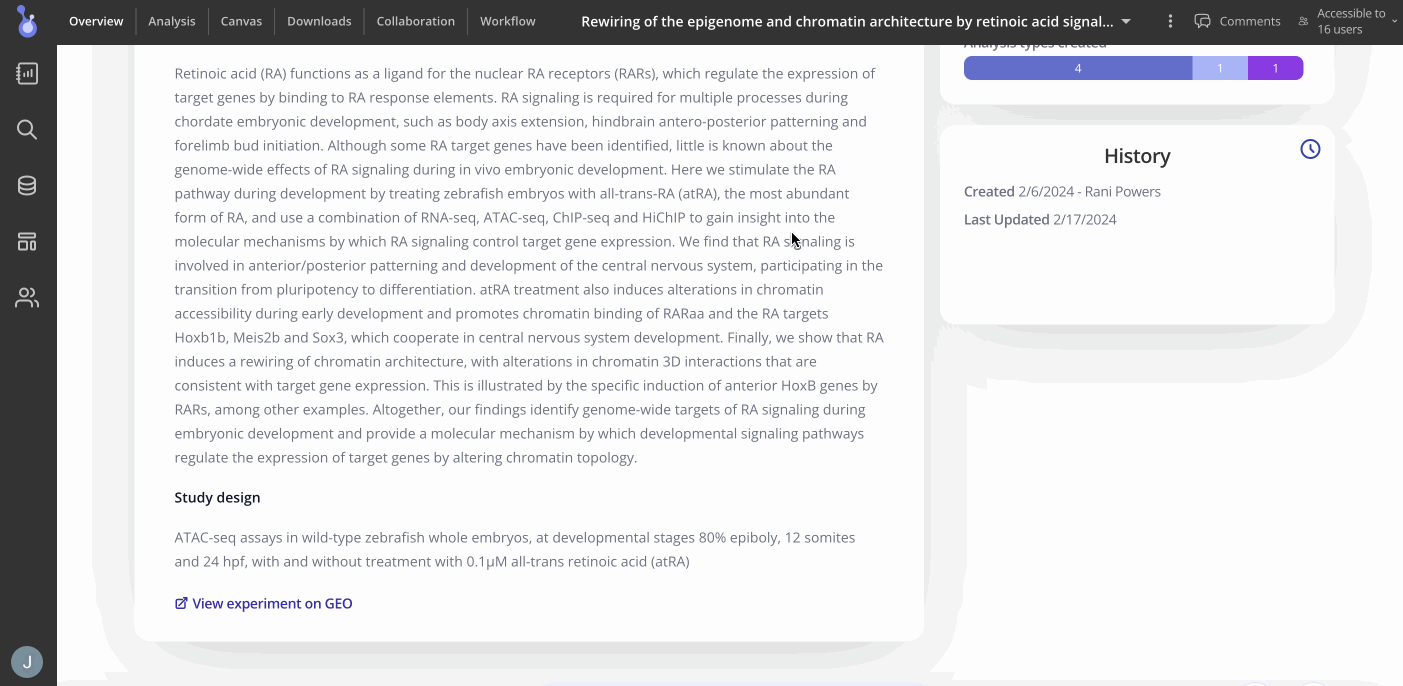
Next, you'll be directed to your experiment overview page where you can add notes to share with collaborators, see how many analyses you've run for that experiment and view uploaded sample data, assay data and the results from the ATAC-seq pipeline.
You can proceed to the Analysis tab by clicking "Analysis" at the top of the Overview page to start making plots. Press the "+Analysis" button to see what plots are available for your experiment.

The following plot types may be of interest for your ATAC-seq experiment
Differential Binding Analysis (Heatmap or Volcano plots)