Learn how to use workflows to apply a set of ordered preprocessing steps to your single cell RNA-seq data set
Written by Caitlin Winkler, PhD
Single cell RNA sequencing introduces a new Preprocessing phase to the Pluto Experiment roadmap. During the Preprocessing phase, you will use workflows to perform a series of steps to filter, normalize, and cluster your single cell data following initial processing with our single cell RNA-seq pipeline. You must create and finalize a workflow on the Preprocessing page in order to proceed to cluster annotation and downstream analysis.
Create an initial workflow
After successful completion of the single cell RNA-seq pipeline, you will see a new banner on your experiment homepage indicating that your experiment is ready for preprocessing. You can either click directly on the banner or click either of the two entry points to the Analysis page to being preprocessing your data.
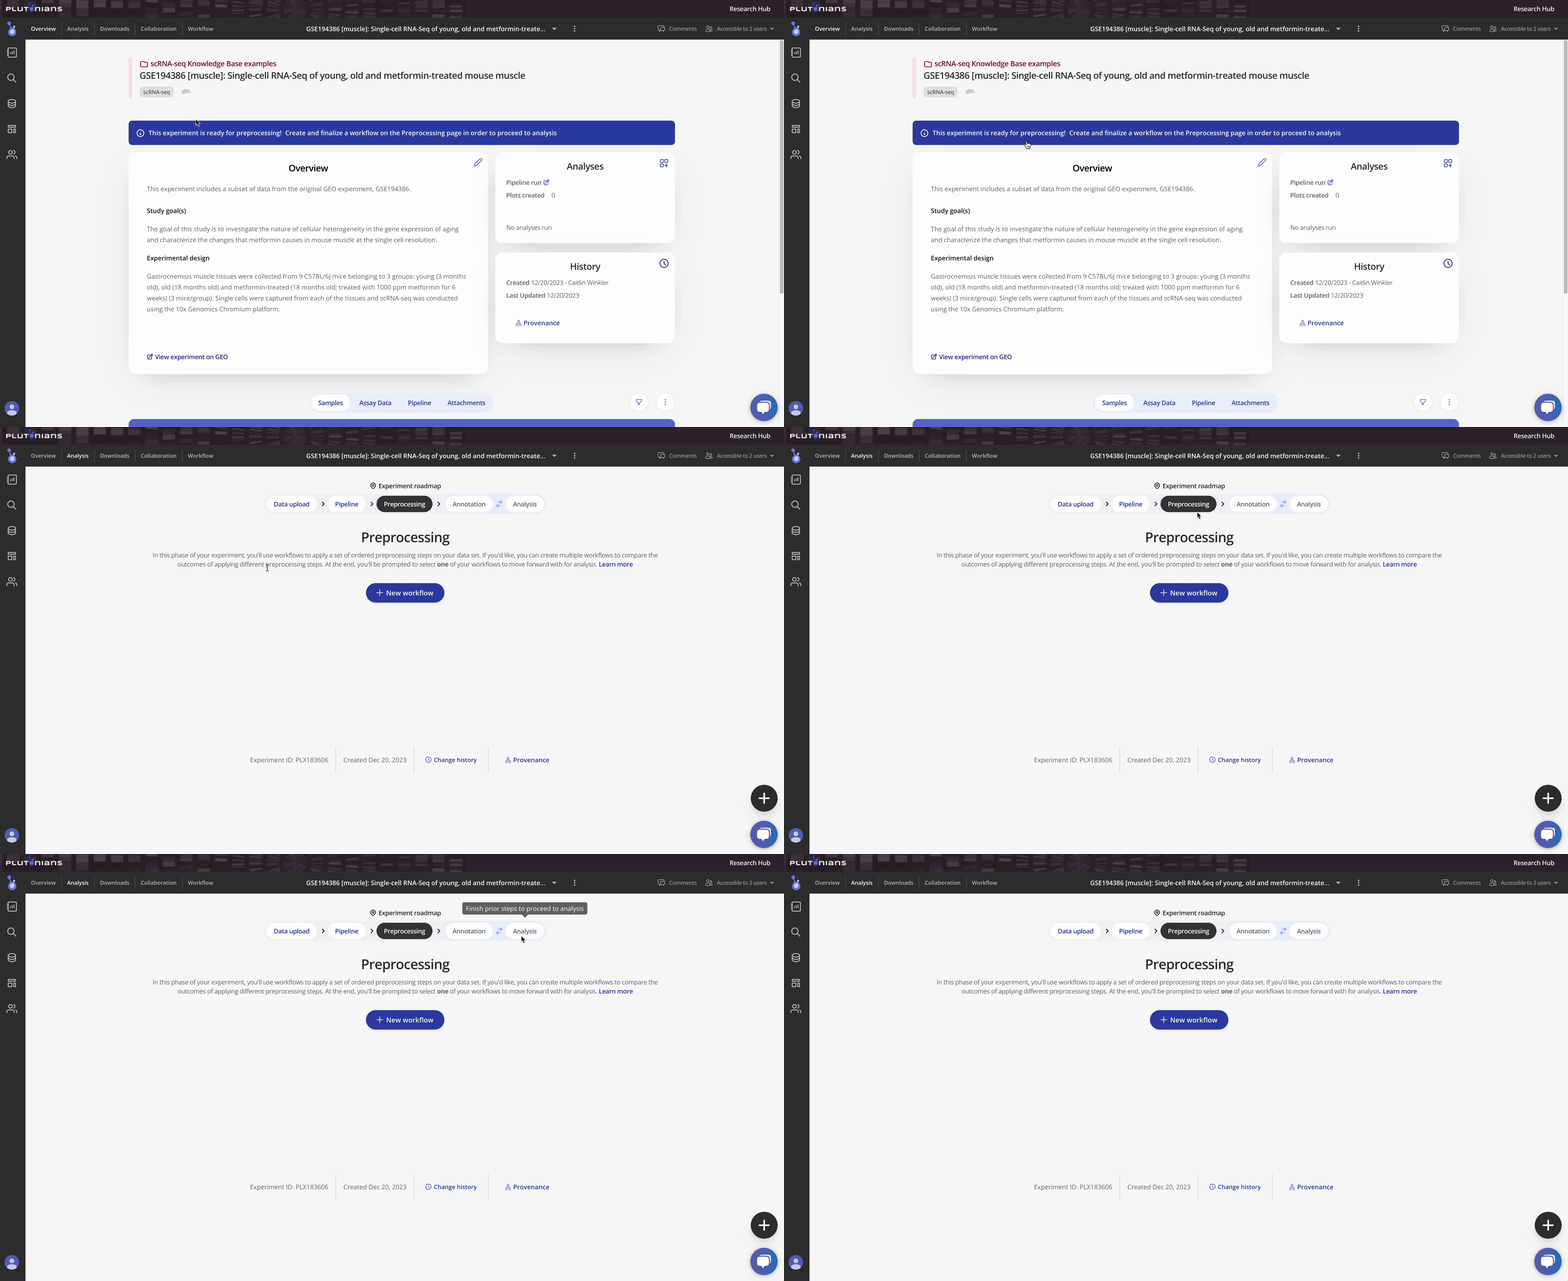
You'll see that access to the Annotation and Analysis phases of the Experiment roadmap are initially locked. You can accesses these phases once you create and finalize a preprocessing workflow.
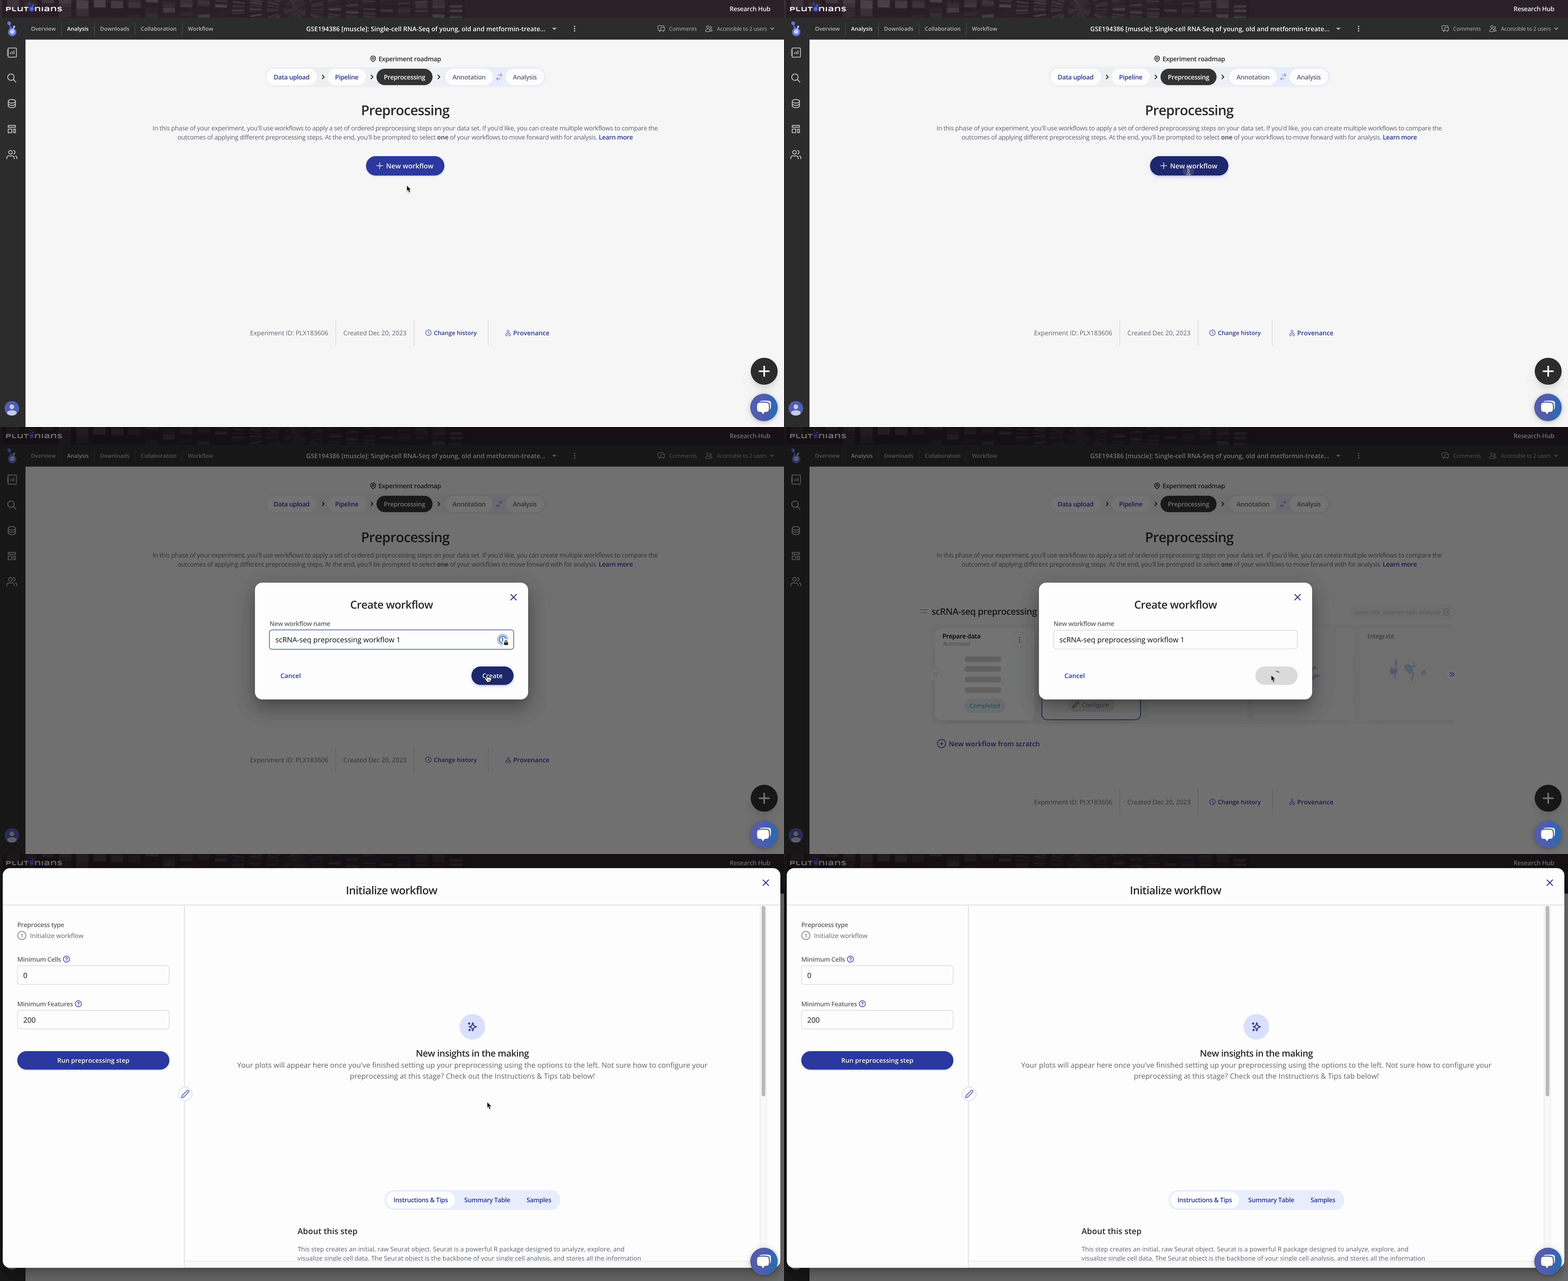
To create an initial workflow, simply click the + New workflow button.
Copy an existing workflow
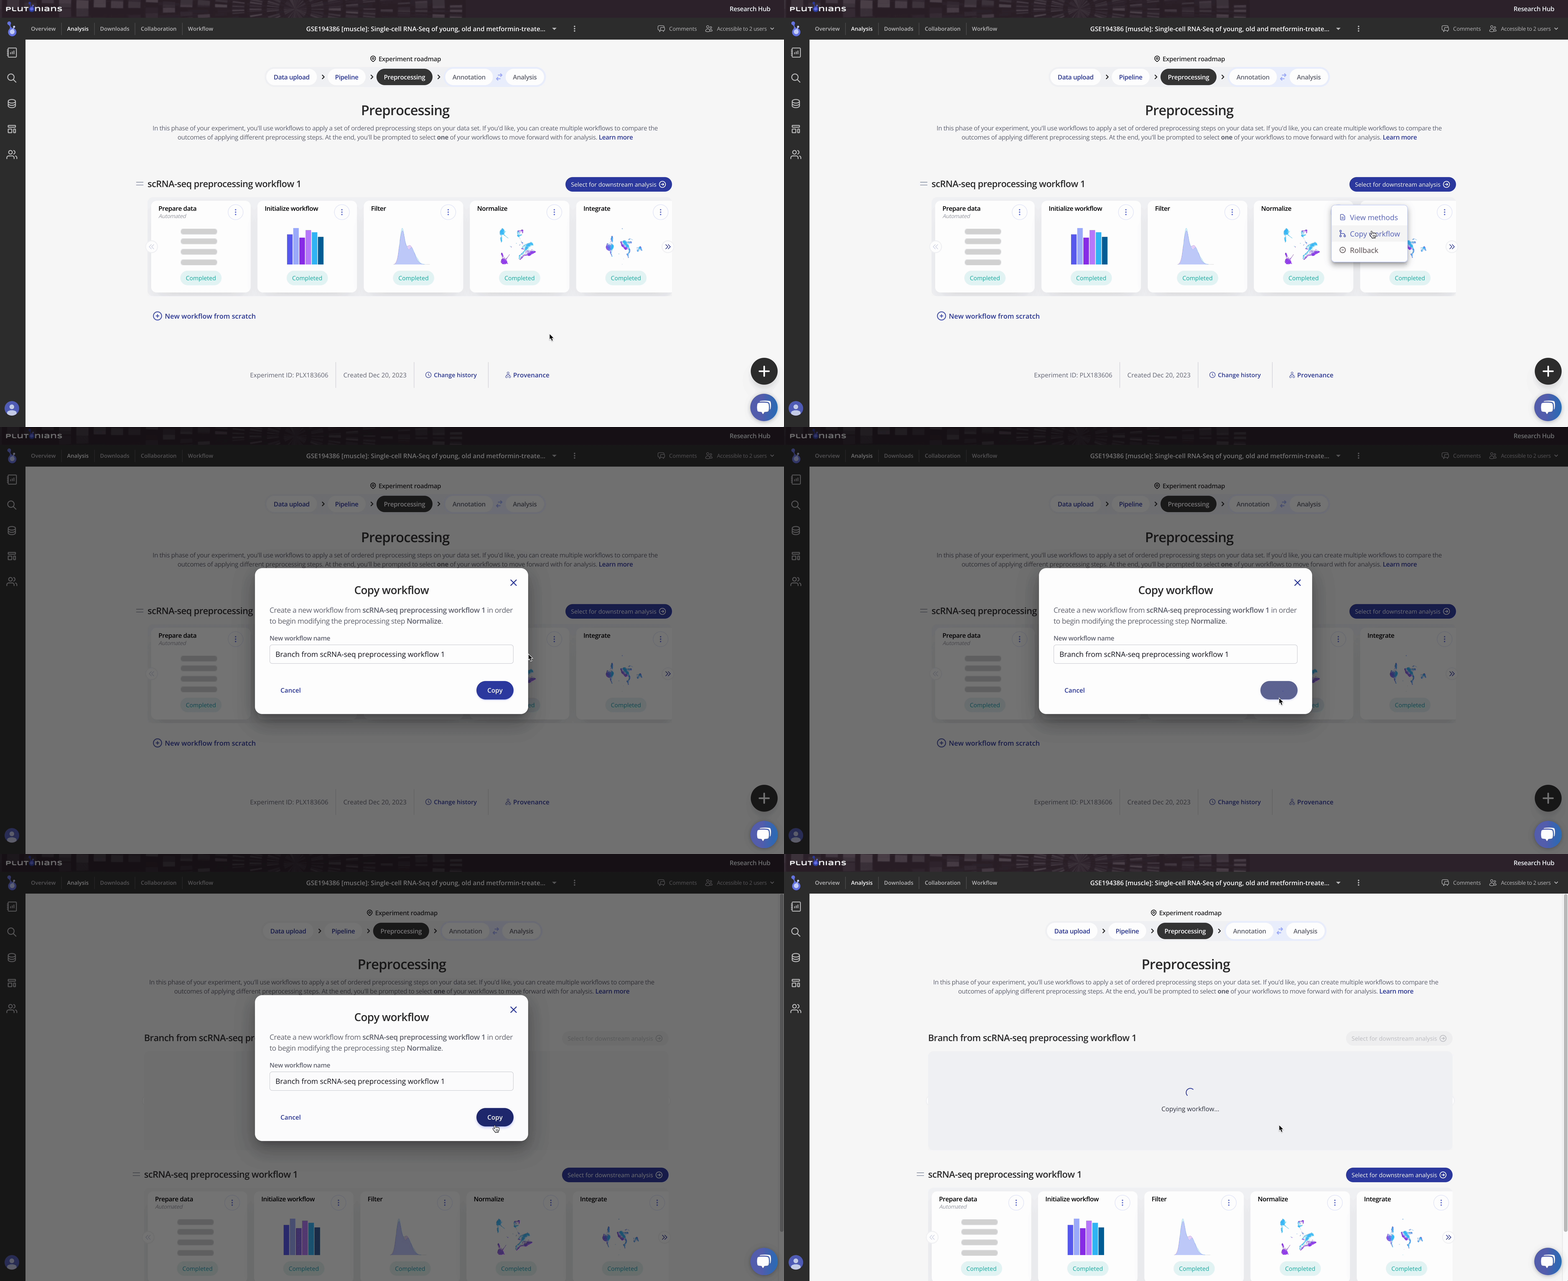
Workflows support branching, which lets you try out and compare different parameters and preprocessing approaches. You can branch from a preprocess in the Completed state from an existing workflow. You will be able to modify the preprocessing step that you branched from in the new workflow. All previous preprocessing steps up to the branch point will be copied to the new workflow. To create a branch, simply click the vertical ellipses at your desired branch point and click Copy workflow.
After you give your new workflow a name, click Copy. This will create a new workflow that appears at the top of the page.
Roll back an existing workflow
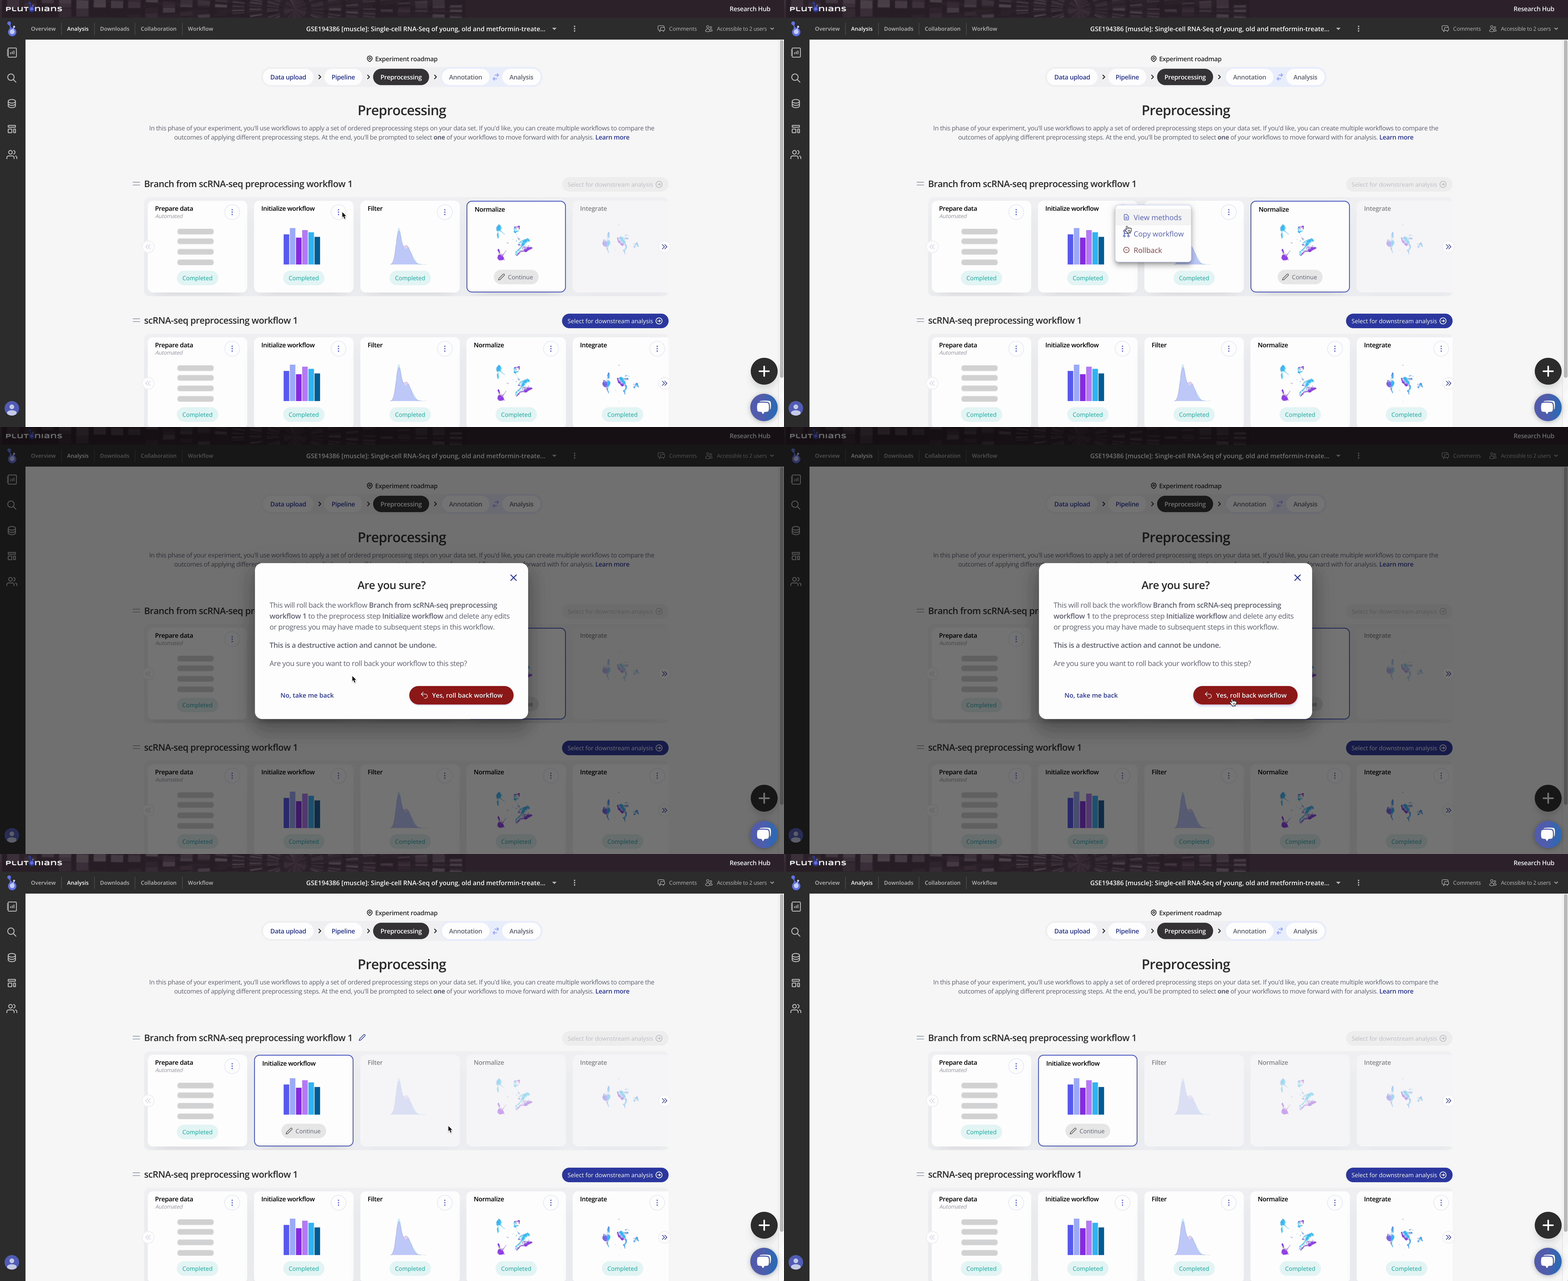
In addition to copying and branching from workflows, you can also roll back a workflow. When you roll back a workflow, you can reset the workflow back to a previous preprocess step, deleting any edits or progress you may have made to subsequent steps in the workflow. Rolling back a workflow is a destructive action and cannot be undone.
To roll back a workflow, click the vertical ellipses on the preprocess step that you would like to roll back to. Click Rollback, and then click Yes, roll back workflow to confirm that you would like to roll back your workflow.
Create a new workflow from scratch
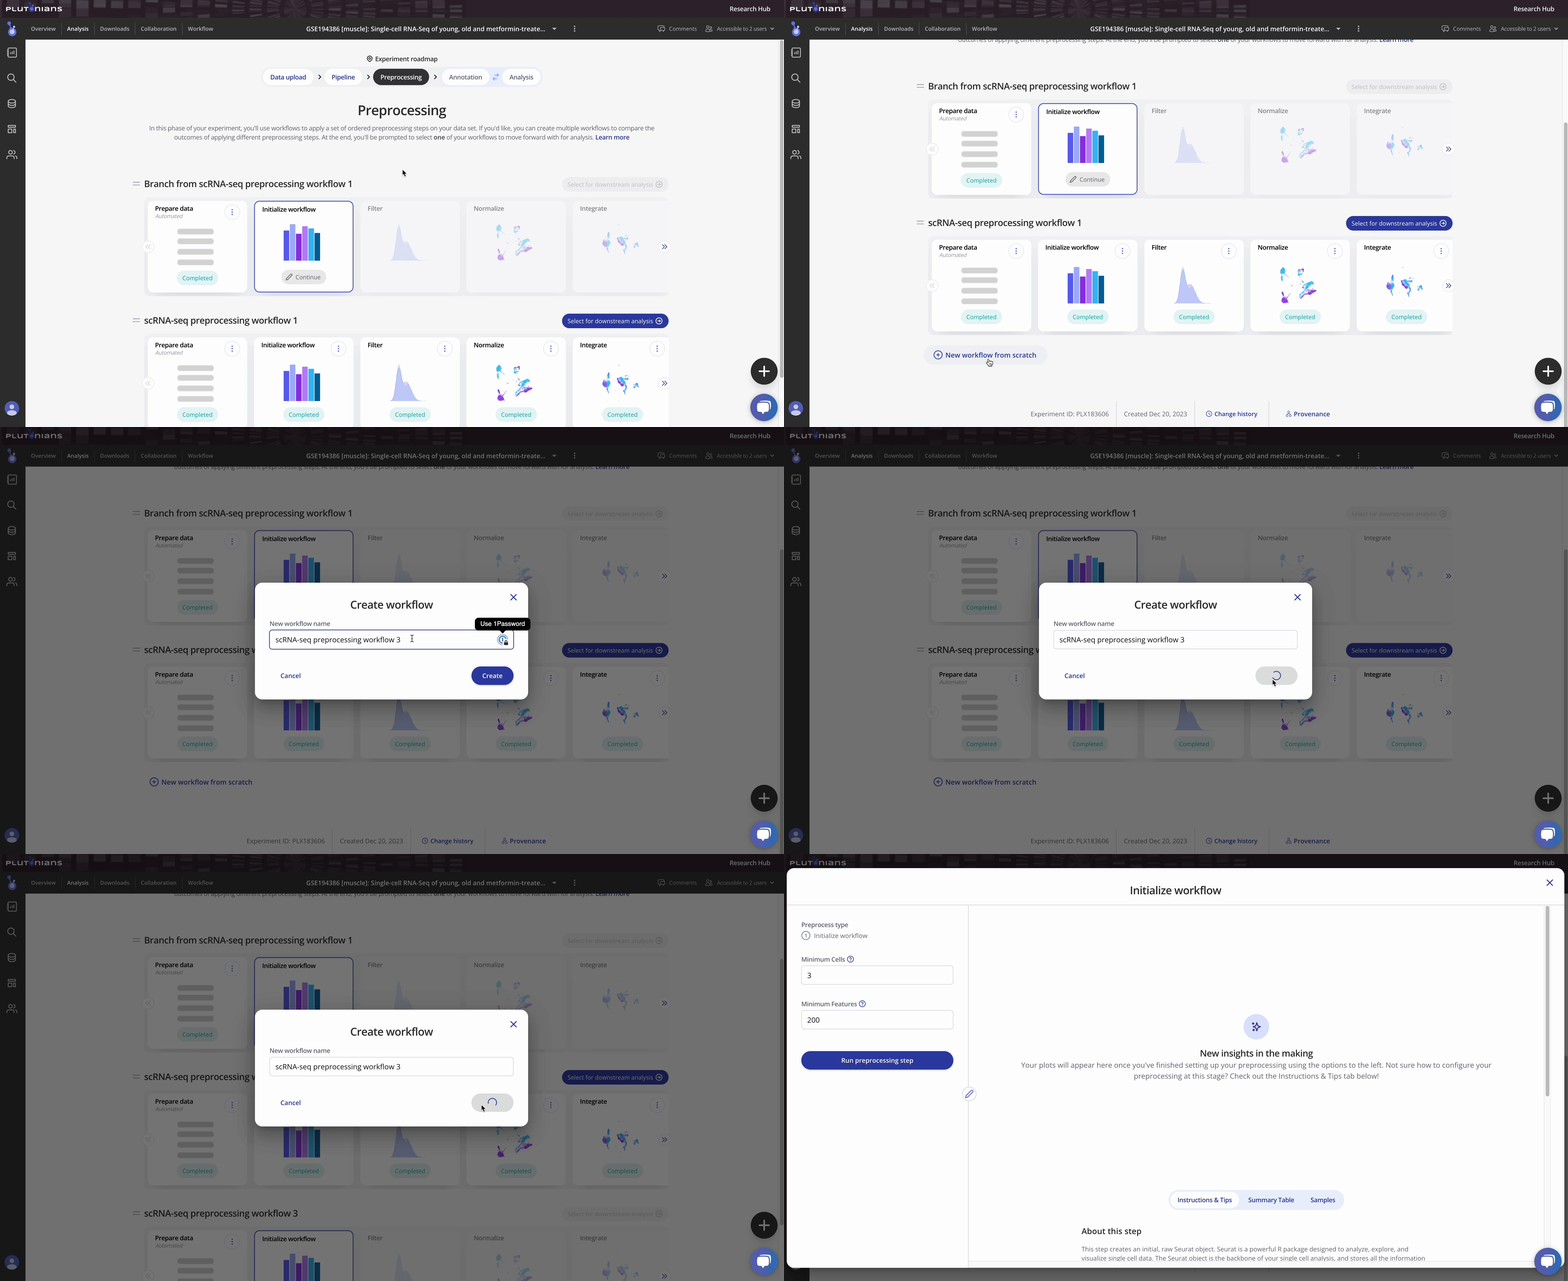
You can also create a new workflow from scratch. Scroll down to the bottom of your workflow, and click + New workflow from scratch. Give your new workflow a name, and click Create. This will create a new workflow beginning at the Initialize workflow step.
Archiving a workflow
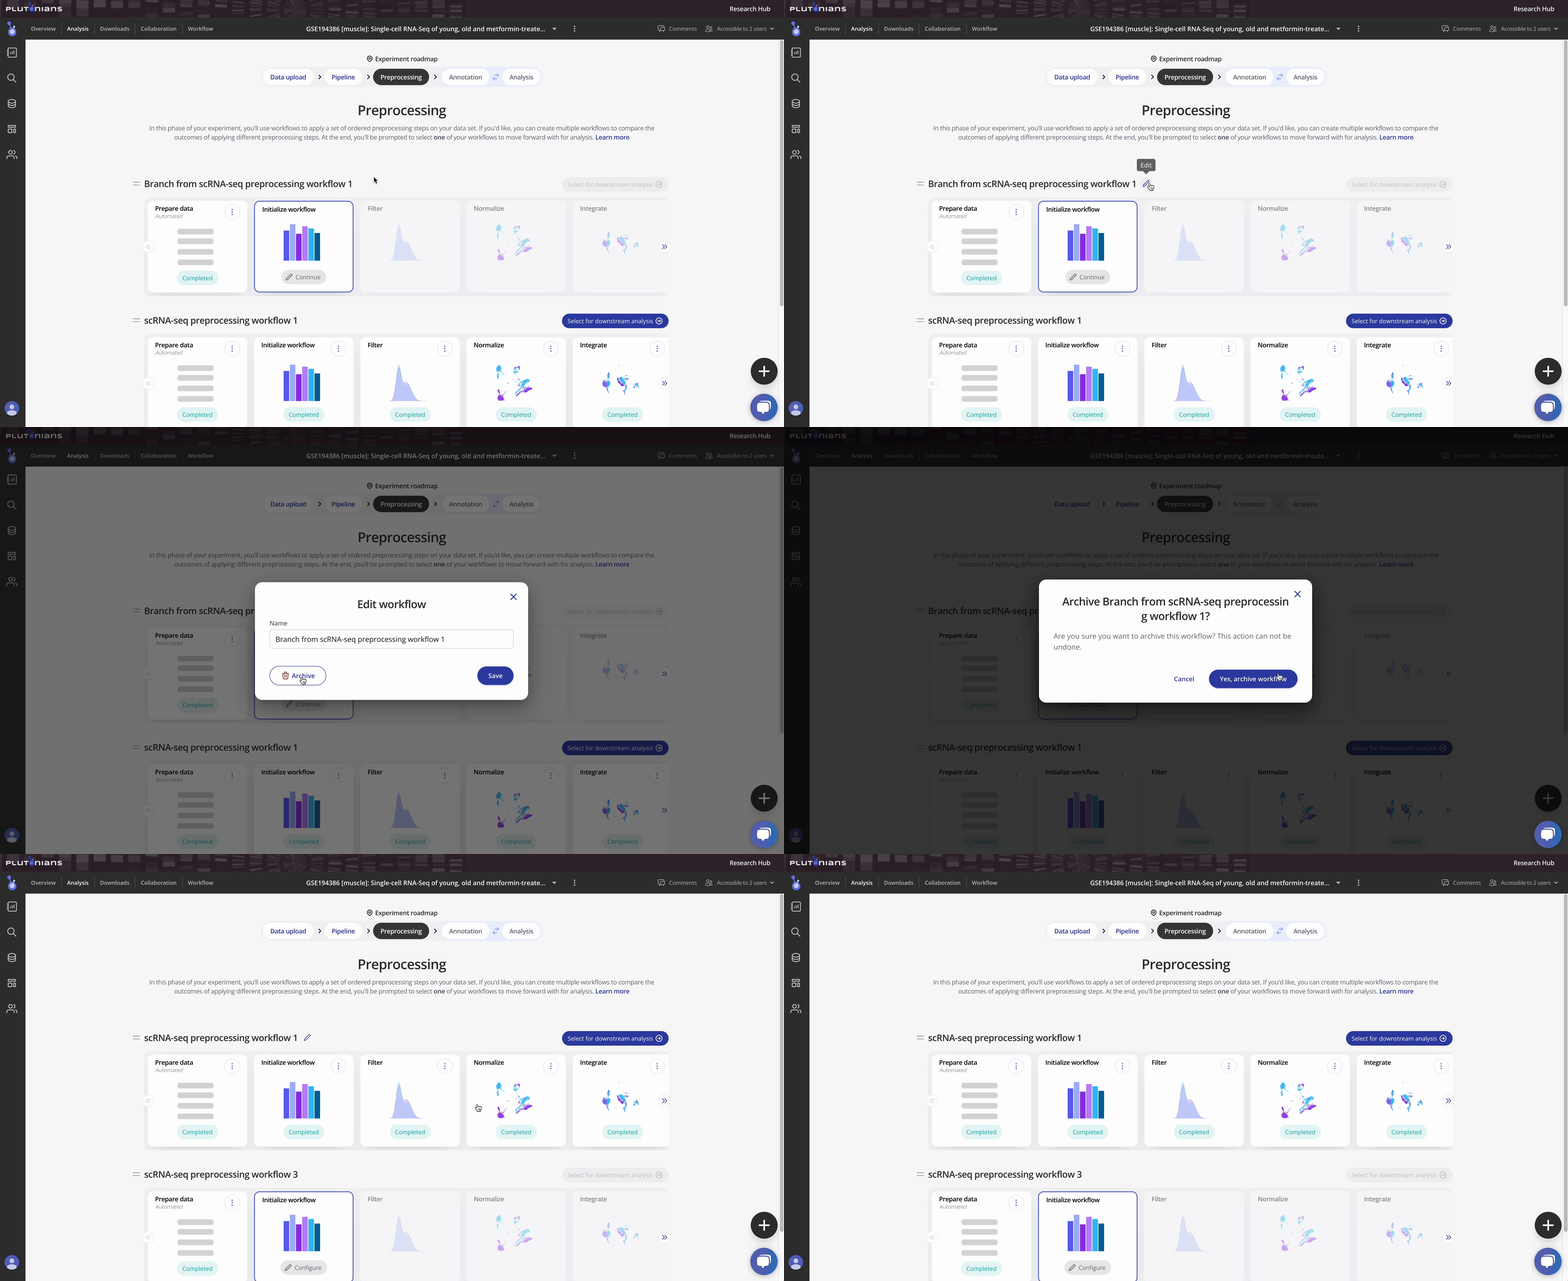
To archive a workflow, click on the workflow name, and then click Archive. Click Yes, archive workflow to remove the workflow from your experiment.
Naming your workflows
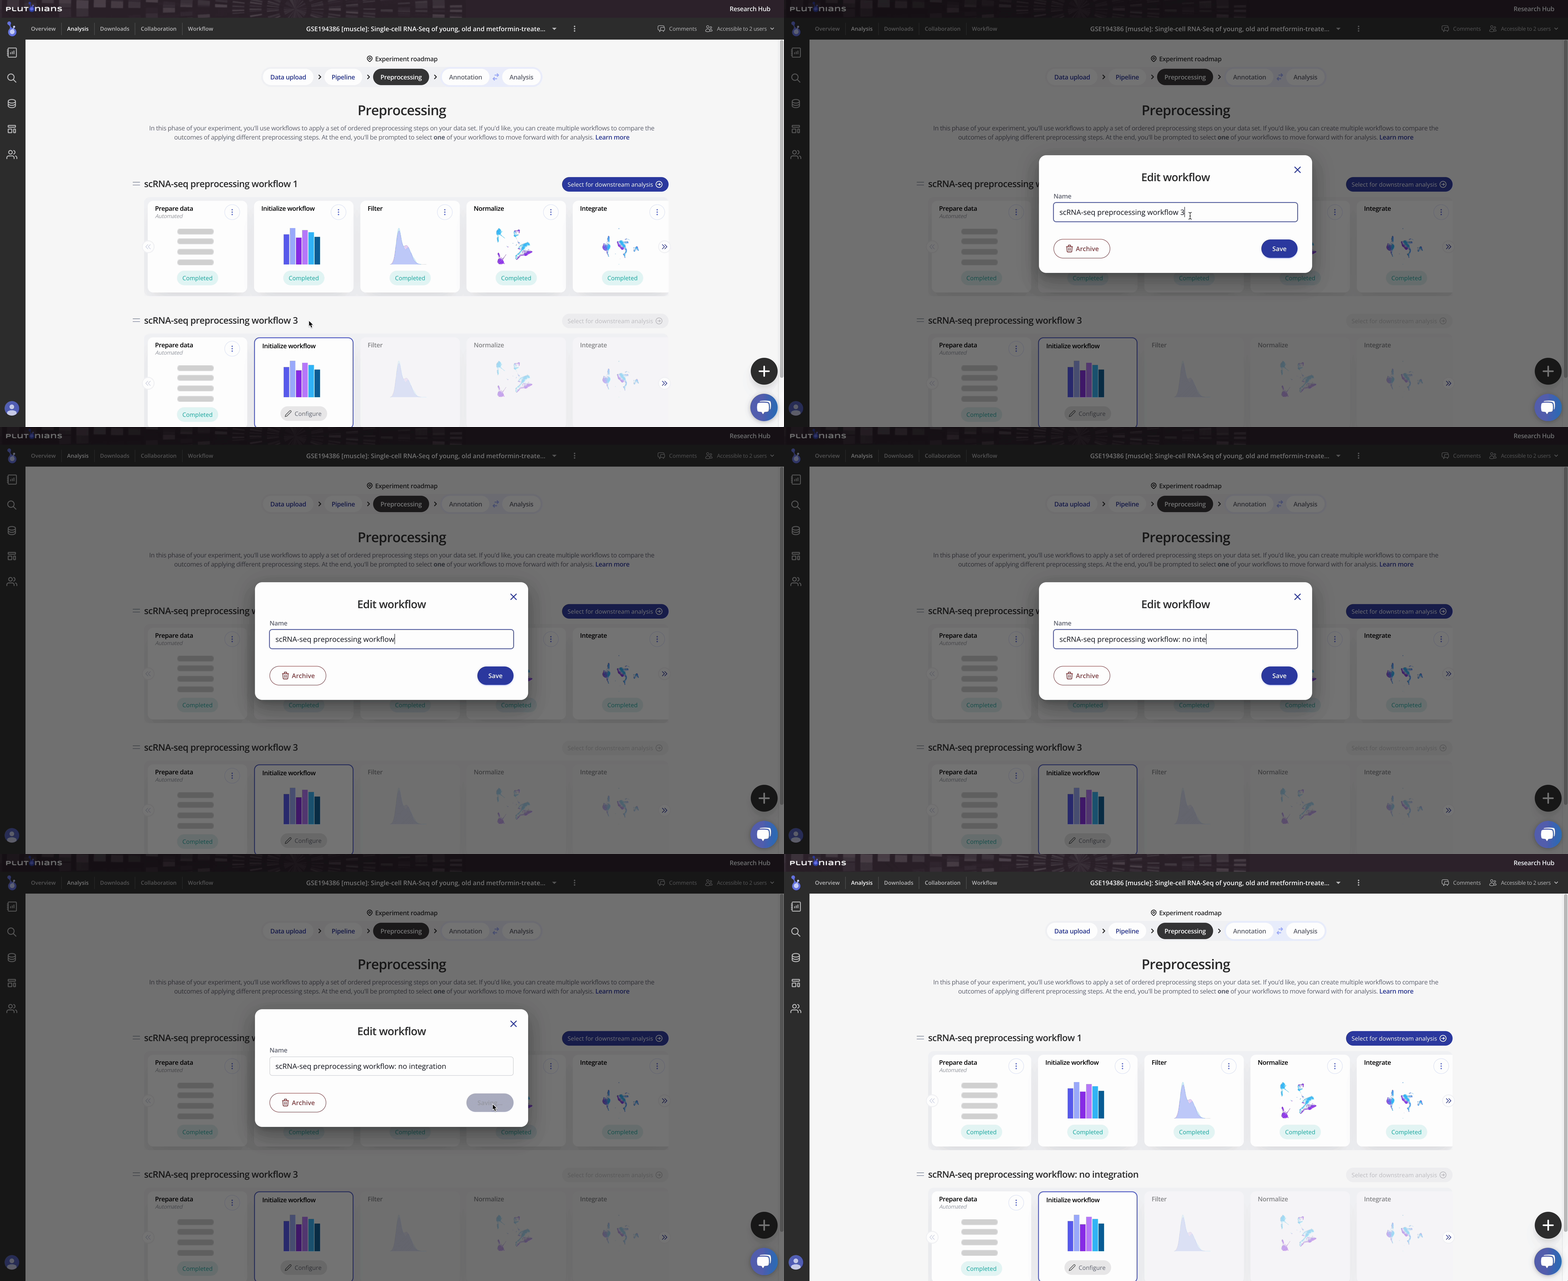
You can change the names of your workflows at any time. Simply hover over the workflow name, click on the workflow name or the pencil icon, edit the workflow name, and click Save.
Organizing your workflows
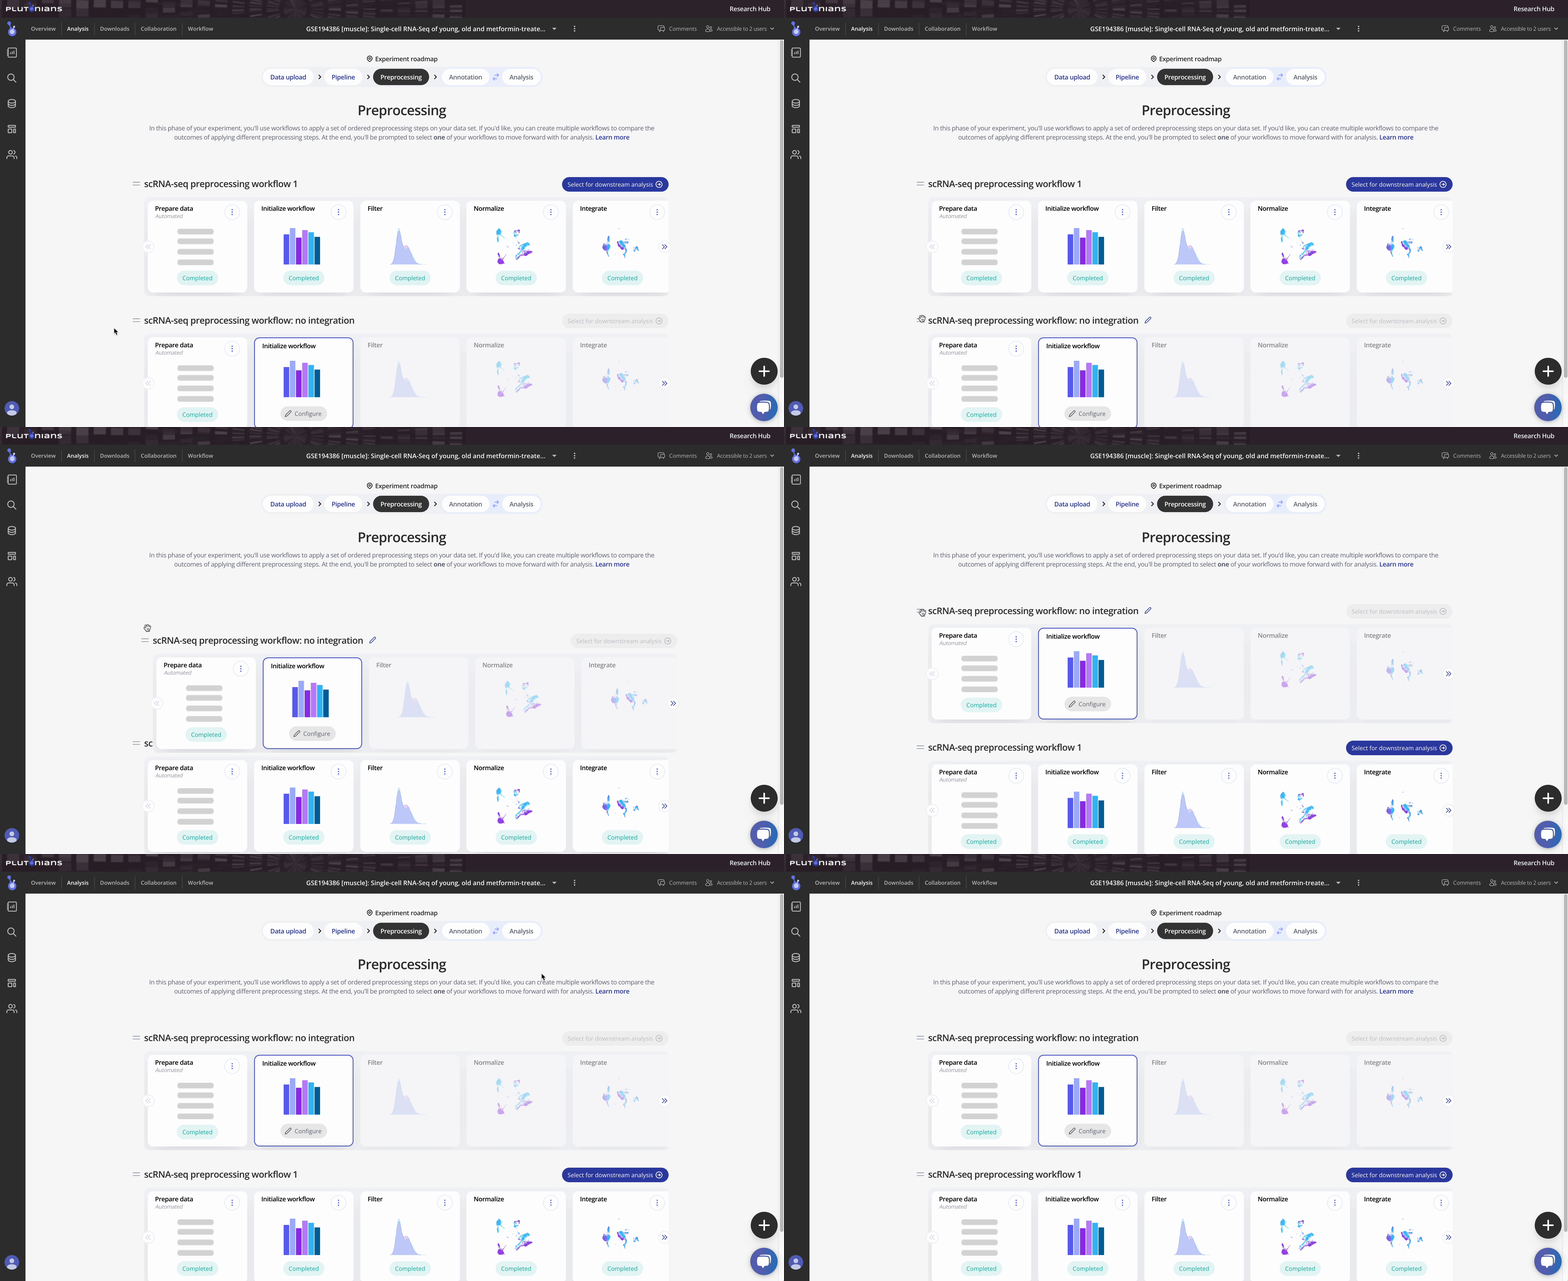
Workflows are draggable, giving you the flexibility to reorder them on your page. To move a workflow, hover over the two horizontal lines next to the workflow's name. Click, hold, and drag the workflow to where you would like it to be on the page.
