Learn how to add meaningful cluster annotations to your single cell RNA-seq data
Written by Caitlin Winkler, PhD
Once you've successfully created and finalized a preprocessing workflow, you can move on the Annotation phase of the Experiment roadmap to assign meaningful annotations to your single RNA-seq clusters.
The Annotation page is always accessible once a preprocessing workflow has been finalized. You can freely navigate between the Annotation and Analysis pages, and update your annotations based on new findings and insights you discover while performing downstream analyses.
Annotation page layout
Following finalizing a preprocessing workflow, the Annotation page will initially show you default annotation sets based on the resolutions you picked during the preprocessing workflow. You can click into any of the annotation sets to get more information about the clusters. Additionally, you can click the vertical ellipses and then click View overview to get some cluster information.
Each annotation set has an overview plot showing all clusters in that annotation set, which is interactive. You can toggle between different clusters by clicking the legend (one click will highlight the cluster, and clicking the cluster again will return the plot to the original view).
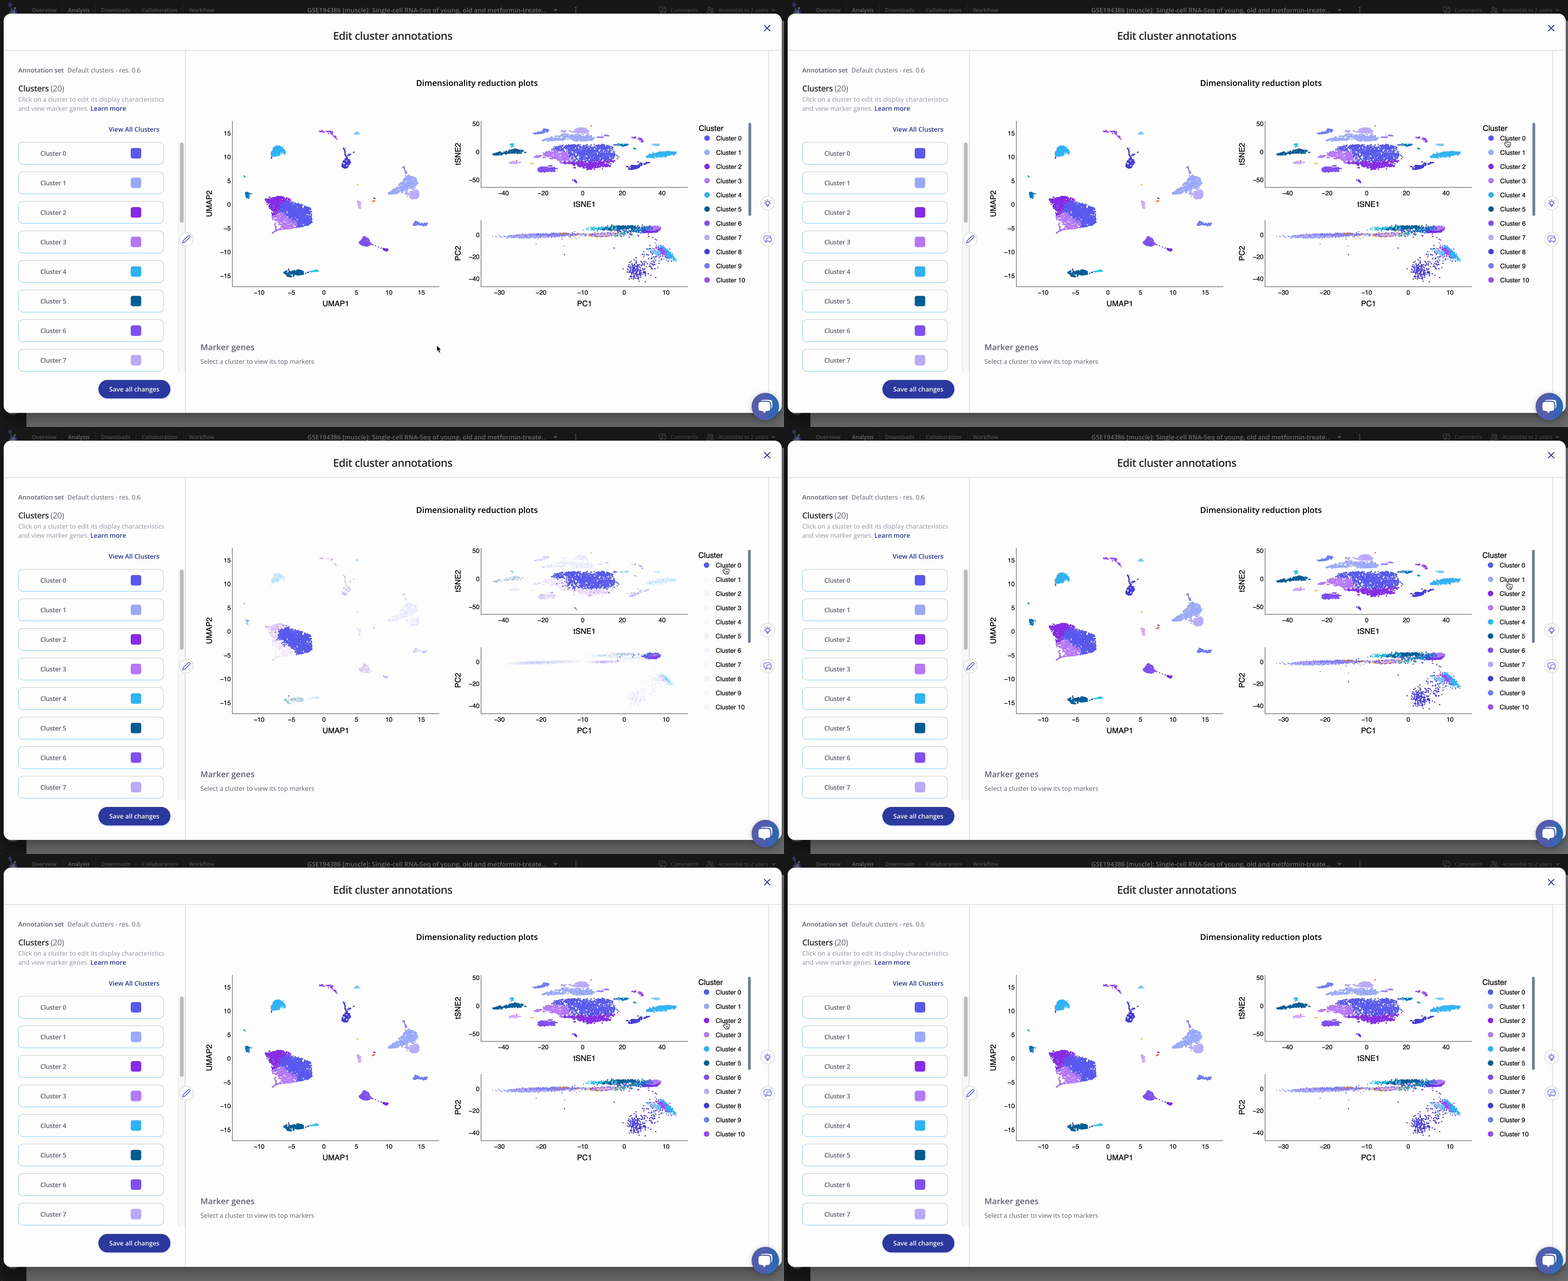
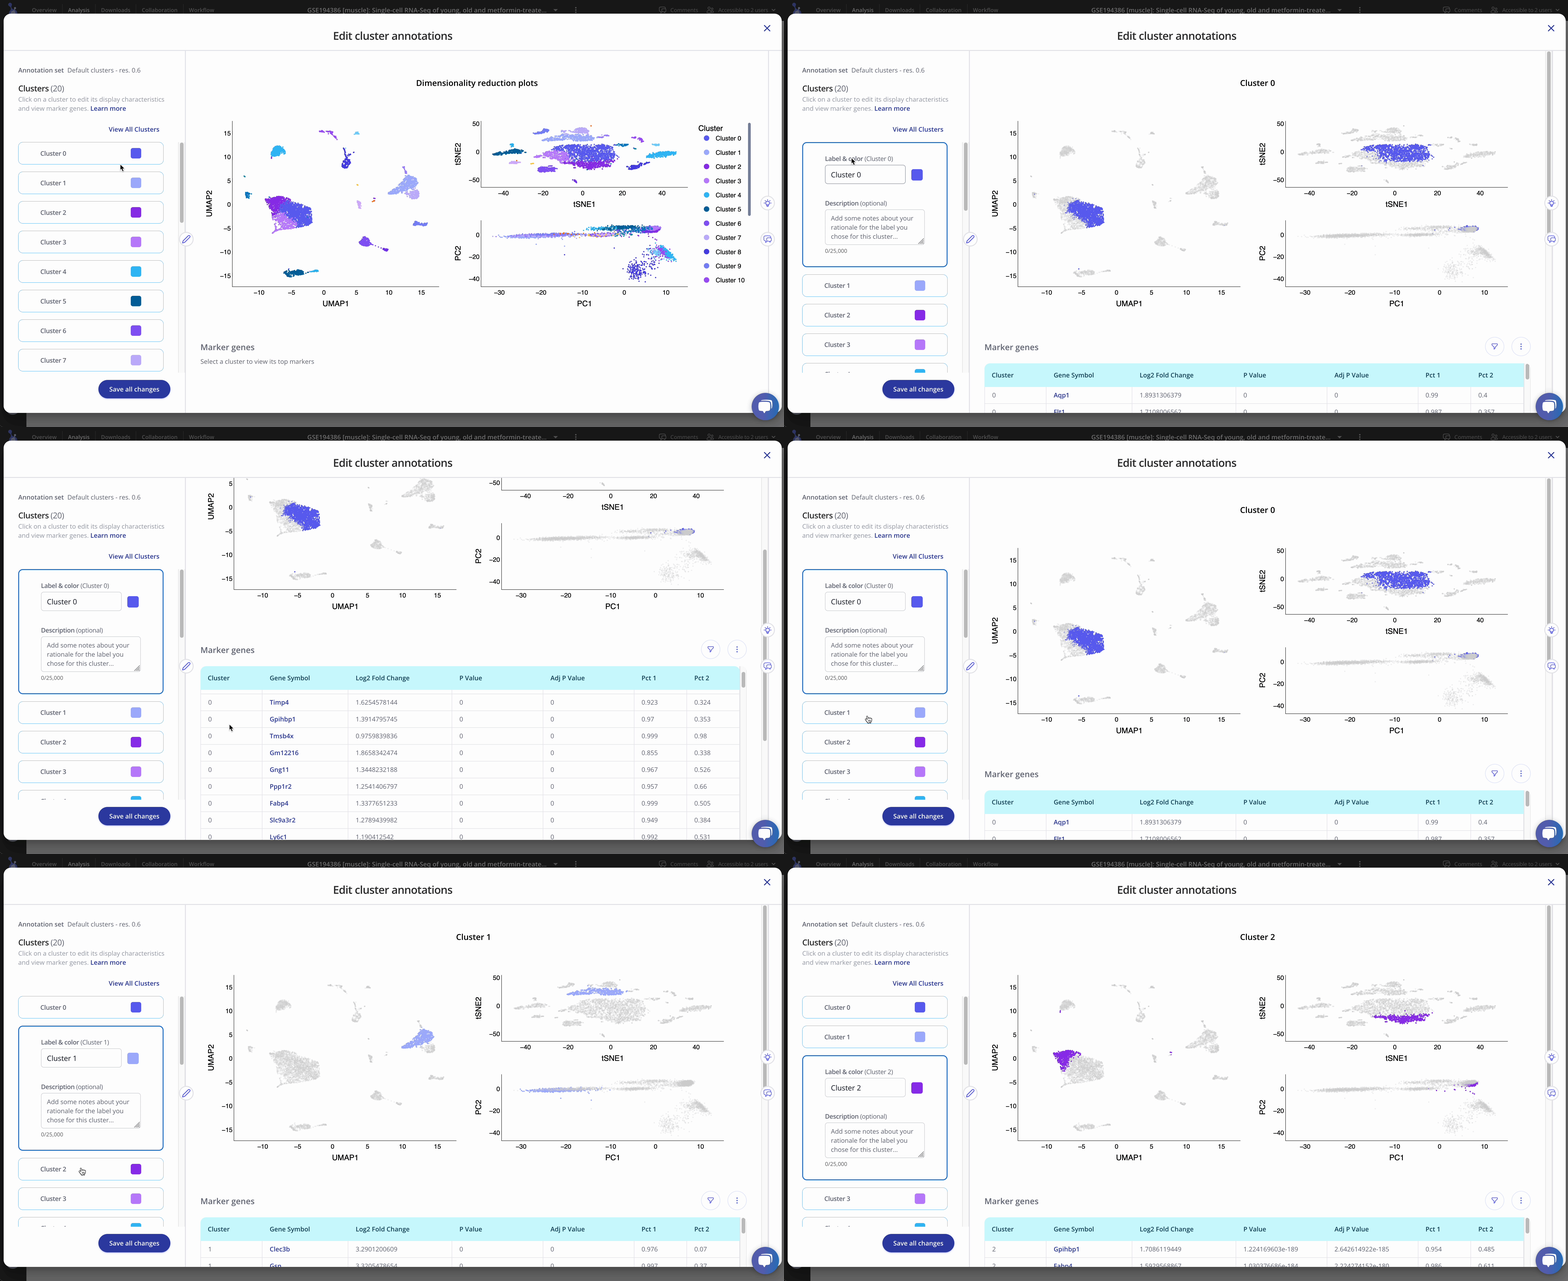
In the left-hand menu of the modal, you can click on a specific cluster to highlight it in the plot and see a table of marker genes that define the cluster. These marker genes were identified during the preprocessing workflow.
Editing existing annotation sets
You can edit any existing annotation set as much as you would like. To change the name of an annotation set, click the vertical ellipses, and then click Rename. Enter your new display name for the annotation set and click Save.
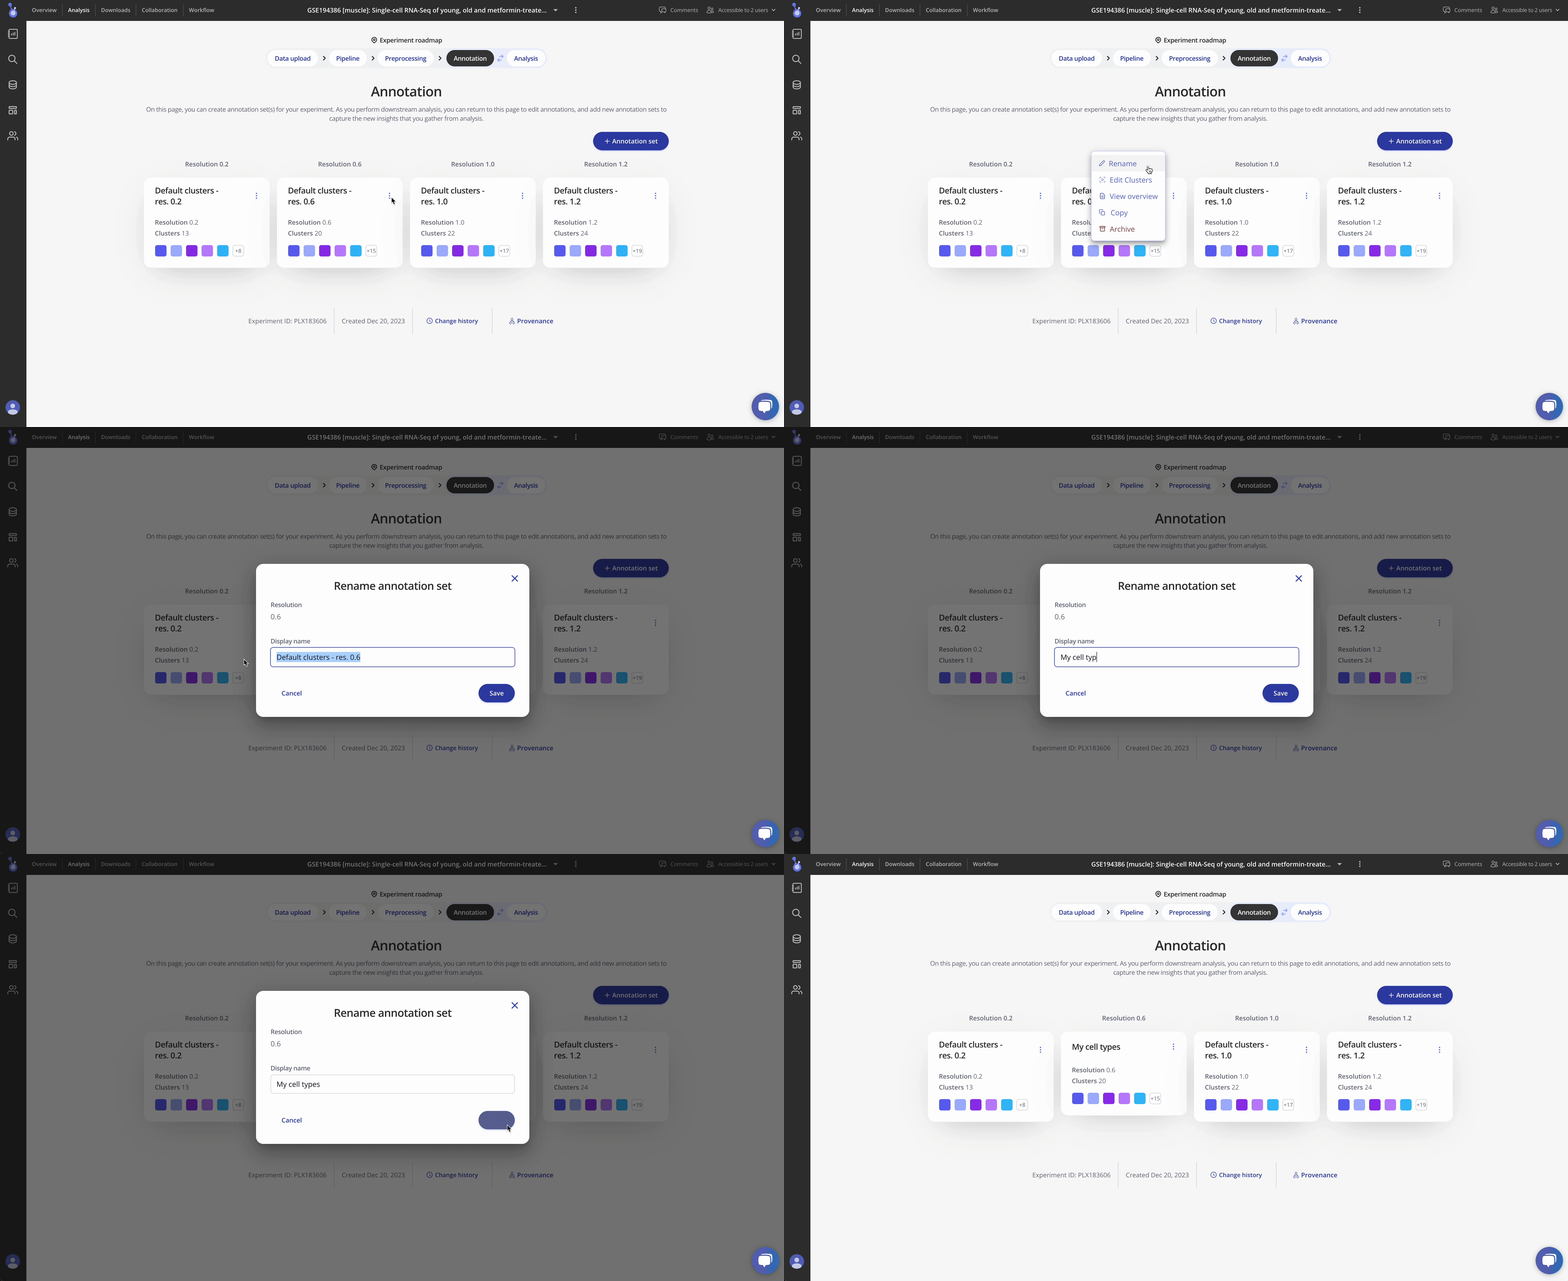
To edit the individual clusters, click on the annotation set card or click the vertical ellipses and then click Edit clusters. You can update the label for each cluster, the plot color for each cluster, and add a description (i.e., include some notes about your rationale for the label you chose for the cluster, etc.). If you make changes, be sure to click the Save all changes button at the bottom of the modal menu. You will be prompted to confirm any edits you're made. If you have existing analysis plots that were based on the annotation set you've edited, the plots will be regenerated to reflect your edits.
Creating a new annotation set
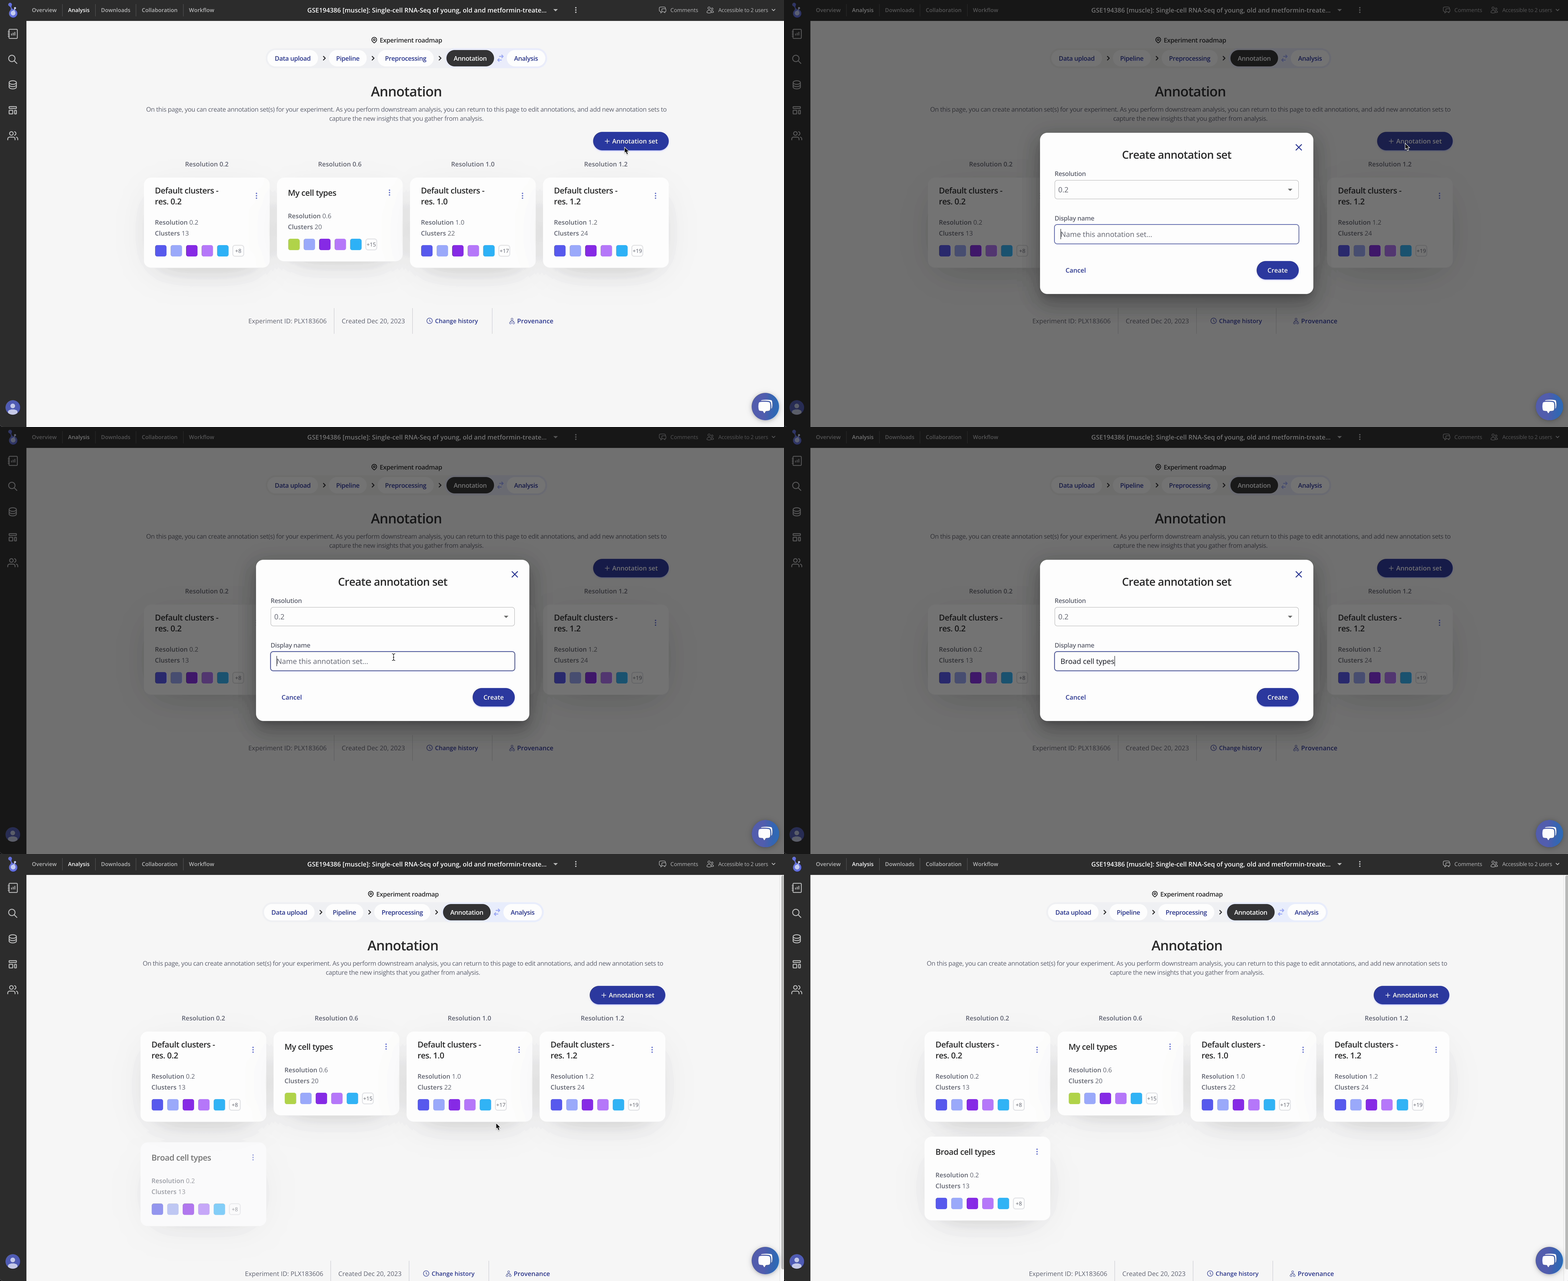
To create a new annotation set from one of your resolutions, click the + Annotation set button, select the resolution you would like to create a new annotation set from, give your annotation set a meaningful display name, and then click Create.
Archiving an annotation set
To remove an annotation set, click the vertical ellipses of the annotation set you would like to remove, and then click Archive. You will be prompted to confirm that you want to remove the selected annotation set. Click Yes, remove annotations to proceed. Note that removing an annotation set will also remove any plots that were created using that annotation set.
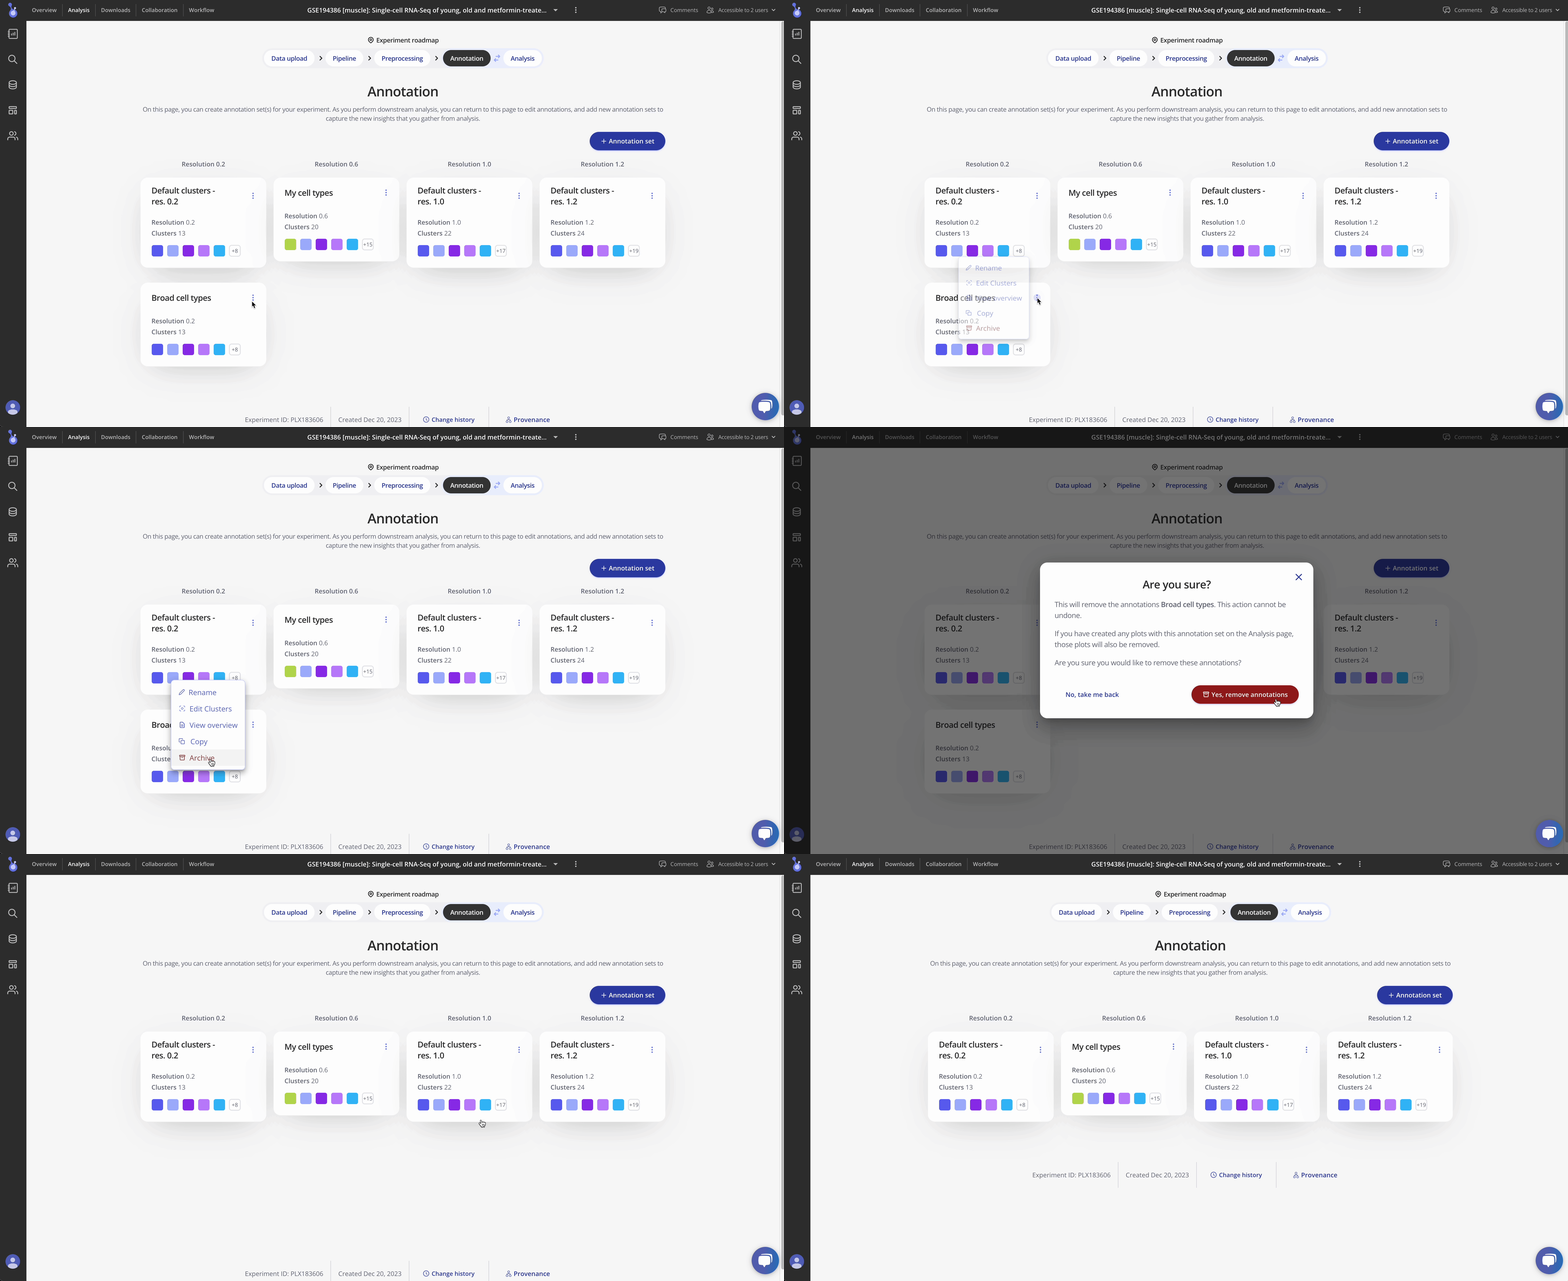
Removing an annotation set does not remove a resolution from your data. You will always be able to create new annotation sets from any of the resolutions in your data, even if you remove all annotation sets from the Annotation page.
