Steps to use JumpCloud to authenticate into Pluto
Pluto seamlessly integrates with JumpCloud's SAML 2.0-based single sign-on (SSO) solution, allowing users to log in to Pluto using their JumpCloud credentials. Once the configuration is complete, users will be required to sign in to Pluto through JumpCloud. This integration enables organizations to leverage their existing centralized IT directory to enforce password requirements and implement multi-factor authentication, among other security measures.
Instructions for creating a custom SSO Application
1. Log into JumpCloud Admin Console
Begin by signing in to your JumpCloud Admin Console.
2. Navigate to SSO Applications
Once logged in, navigate to the User Authentication section in the left sidebar and click SSO Applications.
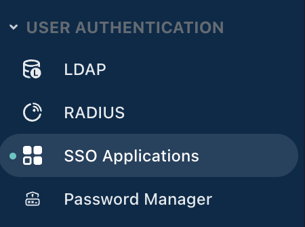
3. Add New SSO Application
Click on the + Add New Application button to add a new SSO application.
4. Choose Custom Application
In the Featured Applications grid, choose the Custom Application option. Then click Next to move onto the configuration page.
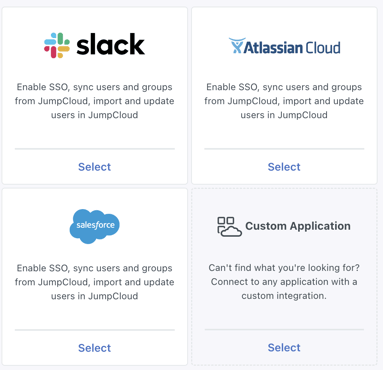
5. Choose Single Sign-On (SSO)
Select Manage Single Sign-On (SSO) and Configure SSO with SAML and click Next. You may need to import users into the app as well.
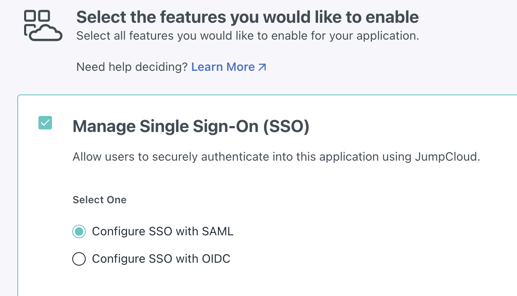
6. Enter general information
Fill in your desired label, description and logo. Move onto Configure Application.
7. Configure SAML application
Populate the following fields:
IdP Entity ID: JumpCloud
SP Entity ID: https://api.pluto.bio
Default URL (ACS URL)*: https://api.pluto.bio/auth/social/complete/saml/
* Note: Ensure the ACS URL has a trailing slash.
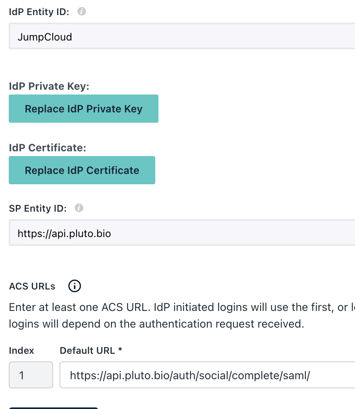
Ensure SAMLSubject NameID is set to email and SAMLSubject NameID Format is set to the email address.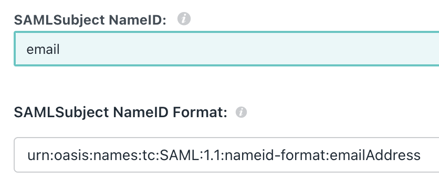
Next, map the following Service Provider attributes to JumpCloud attributes:
first_name: firstname
last_name: lastname
email: email

Keep the remainder of the configurations as the defaults:
Signature Algorithm: RSA-SHA256
Sign Assertion: Unchecked
Default RelayState: Leave empty
Login URL: Leave empty
Declare Redirect Endpoint: Leave empty
8. Save & Export Metadata
Once all the configurations are in place, save the application. JumpCloud will provide you with a metadata URL or allow you to download a metadata.xml file. Please provide one of these to Pluto.

9. Configure Users and User Groups for the SSO application
You will need to enable the SSO application for your users. This section will depend on if you have imported Users from a different application. By default, the SSO application will have the "All Users" User Group added as a default.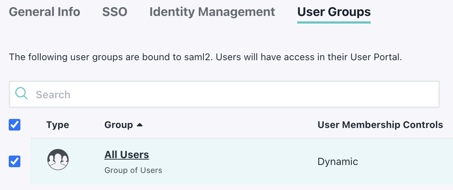
If you have not imported users, you will invite them manually in the Users section under User Management in the sidebar. Click The "+" button to follow the process of inviting a user to the JumpCloud console.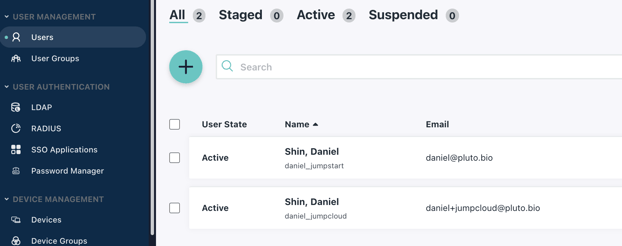
After all the users have been added, navigate to the User Group that is associated with the SSO application (All Users group by default).

Navigate to the Applications tab and ensure that the SSO Application is checked, and click Save.

10. Send SAML Configuration to Pluto
As mentioned in the instructions you provided, once you have the metadata URL or file, you will need to send it to Pluto. Your Pluto representative should provide you with a form to complete this step.
11. Verify SAML Integration with Pluto
Pluto will turn on SAML for the admin user initially. Ensure that the admin user is added to the JumpCloud SAML directory. Once Pluto provides instructions, verify that SAML is working as expected.
12. Enforce SAML for All Users
After verification, Pluto will enforce SAML for all your users. From this point onwards, users logging into Pluto will be redirected to JumpCloud for authentication and then sent back to Pluto post-authentication
