Import FASTQ files from an Amazon s3 bucket to process and analyze them in Pluto
🔒 Note: To configure an AWS S3 bucket for import into Pluto, you'll need sufficient access to create new users in your AWS IAM console. Contact your database / IT admin for assistance.
Large files such as FASTQ files are commonly shared by vendors in s3 buckets, or may be stored in your company's own S3 buckets for internal user. To avoid having to download those large files and upload them into Pluto, you can grant Pluto limited access to fetch the files out of S3 directly.
This guide will walk you through how to grant Pluto read-only access to a limited set of buckets that you select. If you have any questions at all, please feel free to reach out at security@pluto.bio before proceeding.
Create an AWS S3 bucket
If you haven't already done so, create an S3 bucket in AWS. Example:

Move all data to be imported into Pluto into that bucket (e.g. all FASTQ files generated for one RNA-seq experiment). Make a note of the bucket name for later. In the screenshot above, the bucket name is "pluto-data-imports". You can name your bucket whatever makes the most sense to your organization, e.g. "fastqs-for-pluto" or "external-pluto-bio" etc.
Create an IAM User
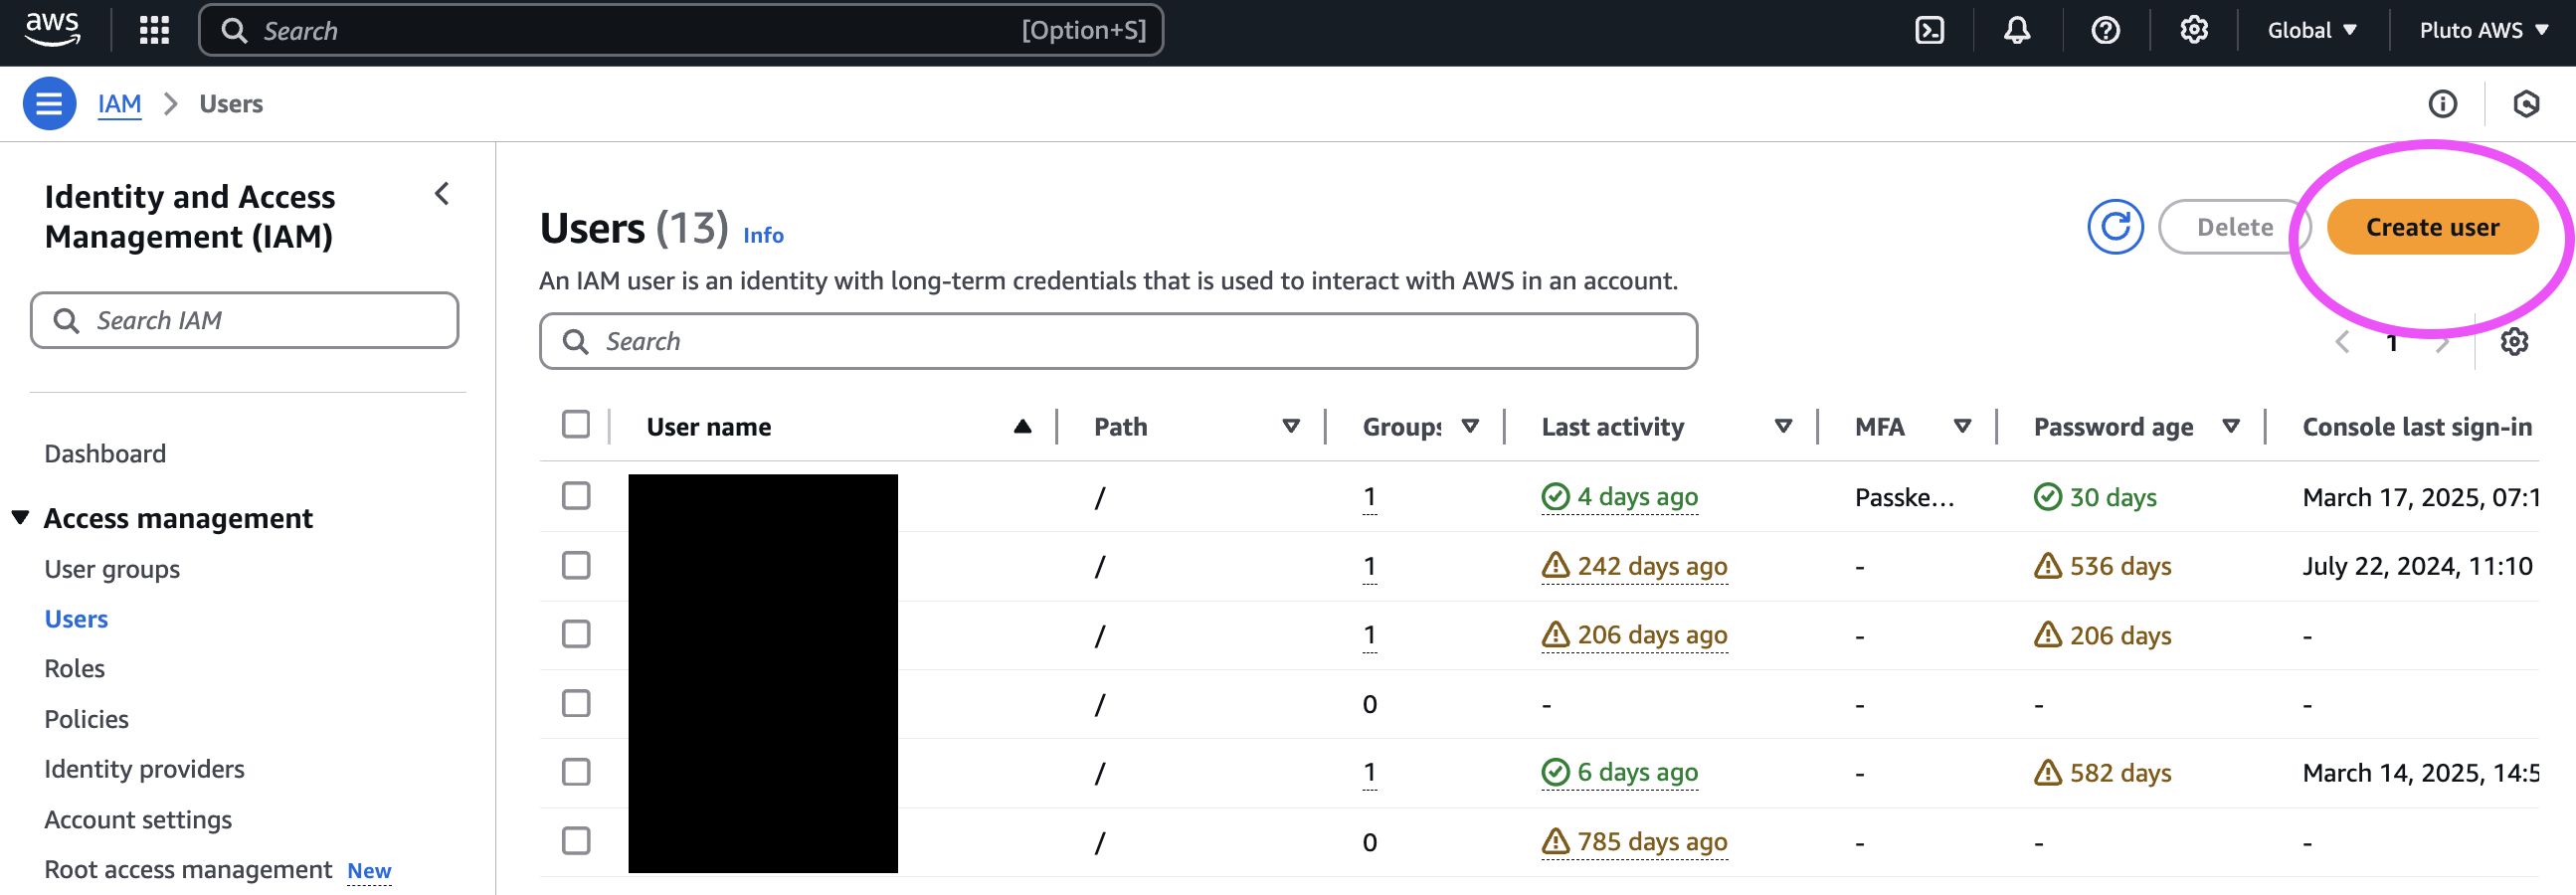
Navigate to IAM > Access Management > Users, and select Create user in the upper right corner.

Set the user name to pluto_bio or something similarly meaningful to you for future reference, and select the Access key - programmatic access option for access type.

On the next step, if you haven't already created a Pluto s3 access policy, click Create policy. (If you've previously created a policy for Pluto access, you can grant the user permissions with the Attach existing policies directly option and search for the previously created policy).

If you select Create policy, it will open a new browser tab with a page for creating a policy or set of permissions in AWS. Switch to the JSON section of the Create Policy screen and paste in the following data, changing BUCKET_NAME to the name of the bucket you created.
{
    "Version": "2012-10-17",
    "Statement": [
        {
            "Sid": "Statement1",
            "Effect": "Allow",
            "Action": [
                "s3:Get*",
                "s3:List*",
                "s3-object-lambda:Get*",
                "s3-object-lambda:List*"
             ],
            "Resource": [
                "arn:aws:s3:::BUCKET_NAME",
                "arn:aws:s3:::BUCKET_NAME/*"
            ]
        }
    ]
}
Nothing else in the JSON needs to be changed except the bucket name(s). Note that each bucket needs 2 string values in the Resource field, one with just the bucket name and a second with the bucket name + /* . The latter allows Pluto to read the objects inside the bucket.
Your policy should look similar to this:

Click Next to continue on and give the new policy a meaningful name and description, then click Create policy.

Return to the tab where you were creating a new user, click the 🔄 icon and search for your newly created policy. Select the policy with the checkbox to its left, and click Next.

Review the set-up on the Step 3 and select Create user:

You'll see a success banner - click the button to View user:

On the User page in AWS, go to the Security credentials tab > Access Key section and Create new access key. Select Third-party service and proceed to creating the key.

Download the CSV containing the credentials you just created, you'll input these to Pluto when you're ready to import FASTQ files. Remember to keep this file safe!

Importing FASTQs from s3 in Pluto
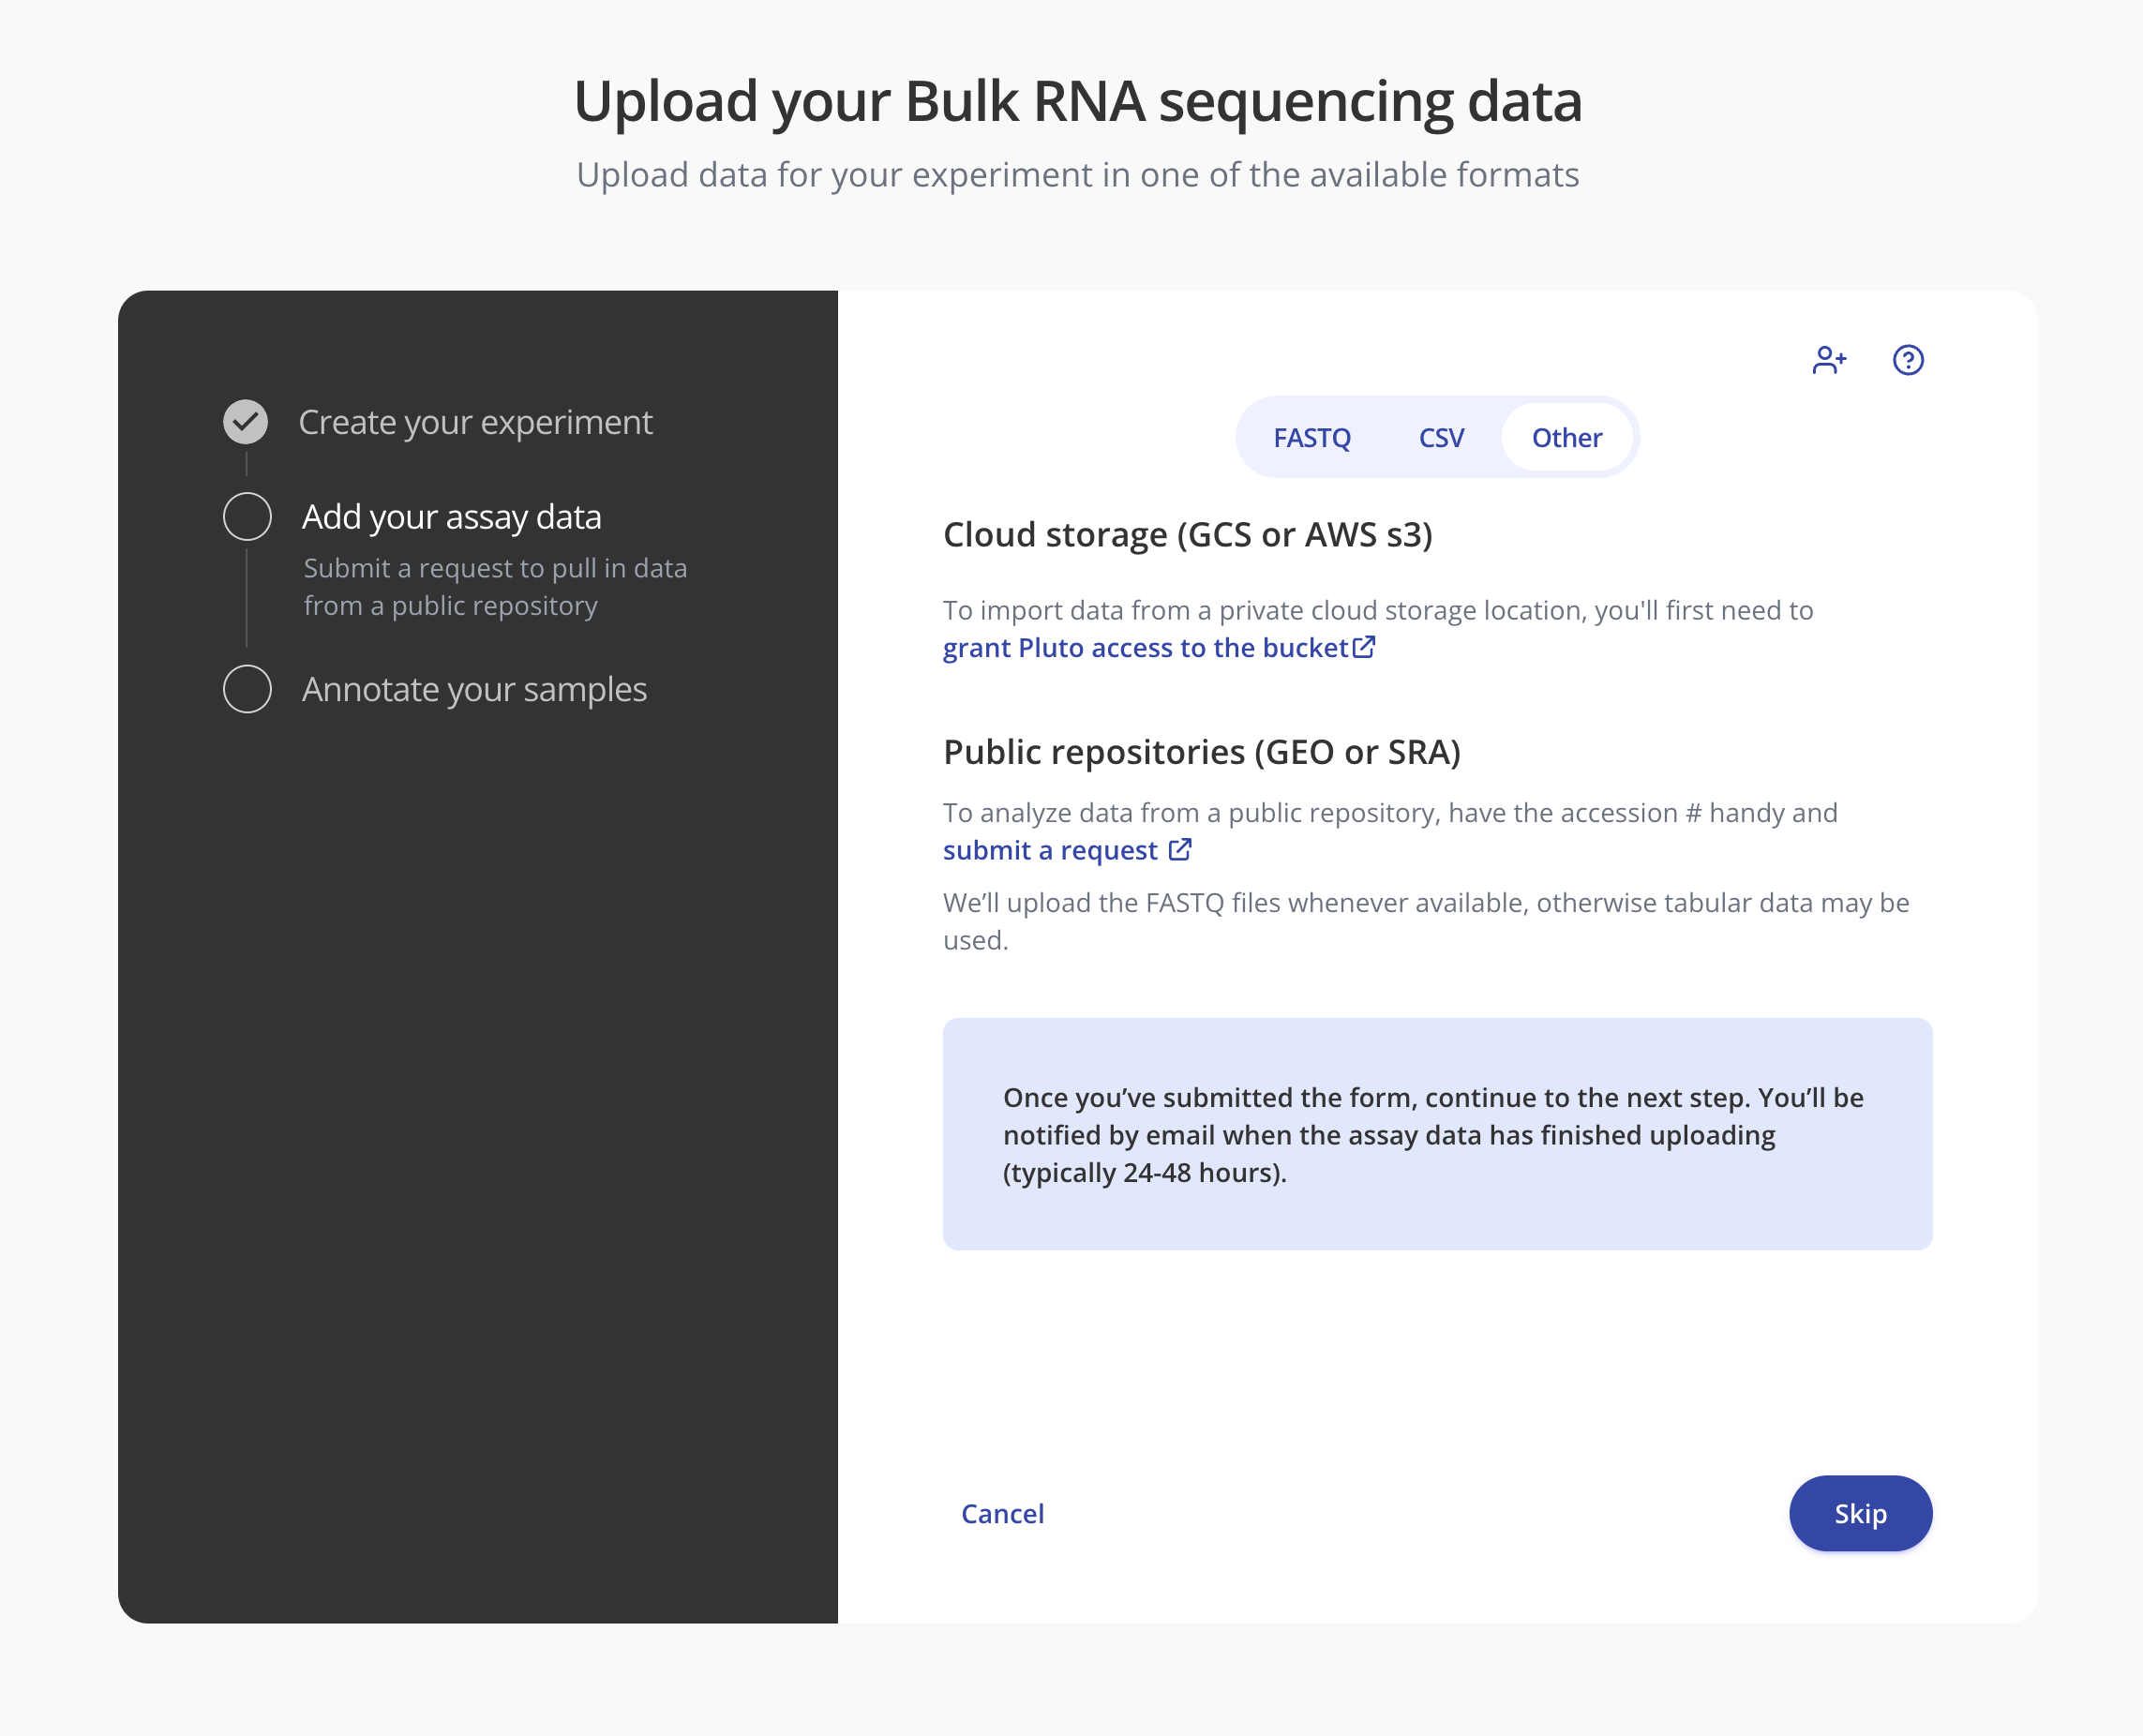
In Pluto, create an experiment and continue to the assay data upload step. Select the Other option and follow the link the grant Pluto access to the bucket. Input the credentials file that you downloaded in the previous step in the corresponding form fields in Pluto, and then you'll receive an email notification when all of the assay data files have been imported!

After uploading the credentials file, you can click Skip or Annotate your samples on the screen above to move to the sample annotation step while your assay data is being imported.
